APIC Dev Jam - Lab 2 - The Developer Portal Experience
In this lab, we will take the API created in Lab 1 and publish it to a Developer Portal, ready for consumption by app developers. We will begin by creating a new catalog and configuring the developer portal for our Inventory product. We will then define a new plan in the product and publish to our new developer portal.
In this tutorial, you will explore the following key capabilities:
-
Configure the Developer Portal and publish the APIs.
-
Create a Portal Account.
-
Create App and Subscribe to Plan.
-
Test API in the Developer Portal
APIC Dev Jam Series
The APIC Dev Jam Series is a hands-on workshop with lab exercises that walk you through designing, publishing, and securing APIs. This workshop is for API developers, architects, and line of business people who want to create a successful API strategy. There are 8 labs and each is 30 minutes long. Make sure you choose enough time in your reservation to get through all the labs!
[NOTE: ][This demo environment contains a full API Connect installation in Cloud Pak for Integration. The login information to the APIC cluster will be sent in a separate email when you reserve the instance. Use Google Chrome, Firefox or Microsoft Edge to access the cluster using the credentials supplied. Make sure you login using API Manager User Registry not Common Services registry.]
Lab 1 : Create and Secure an API to Proxy an Existing REST Web service
Lab 2 : The Developer Portal Experience
Lab 3 : Add OAuth Security to your API
Lab 4 : Use Lifecycle Controls to Version Your API
Lab 6: Working with API Products
Lab 7: The Consumer Experience
Lab 8: Create and test GraphQL Proxy API
Prerequisites: Labs 1
Generate the developer portal
A developer portal for the sandbox catalog was already configured in this environment. A consumer account “ibmuser” was also created to use the Developer Portal server. In this section, login to Developer Portal using the credentials provided in email.
Login to API Connect Developer Portal
-
API Connect Developer Portal provides consumers access to API Catalog information to explore and test APIs, register Applications and subscribe to Plans. Portal Administrator can customize the looks and feel to their organizational specifications. The default Developer Portal looks like below:

-
Some products are visible to all users without an account depending on the Product visibility setting. Additional options are available when you login to the Portal Server.
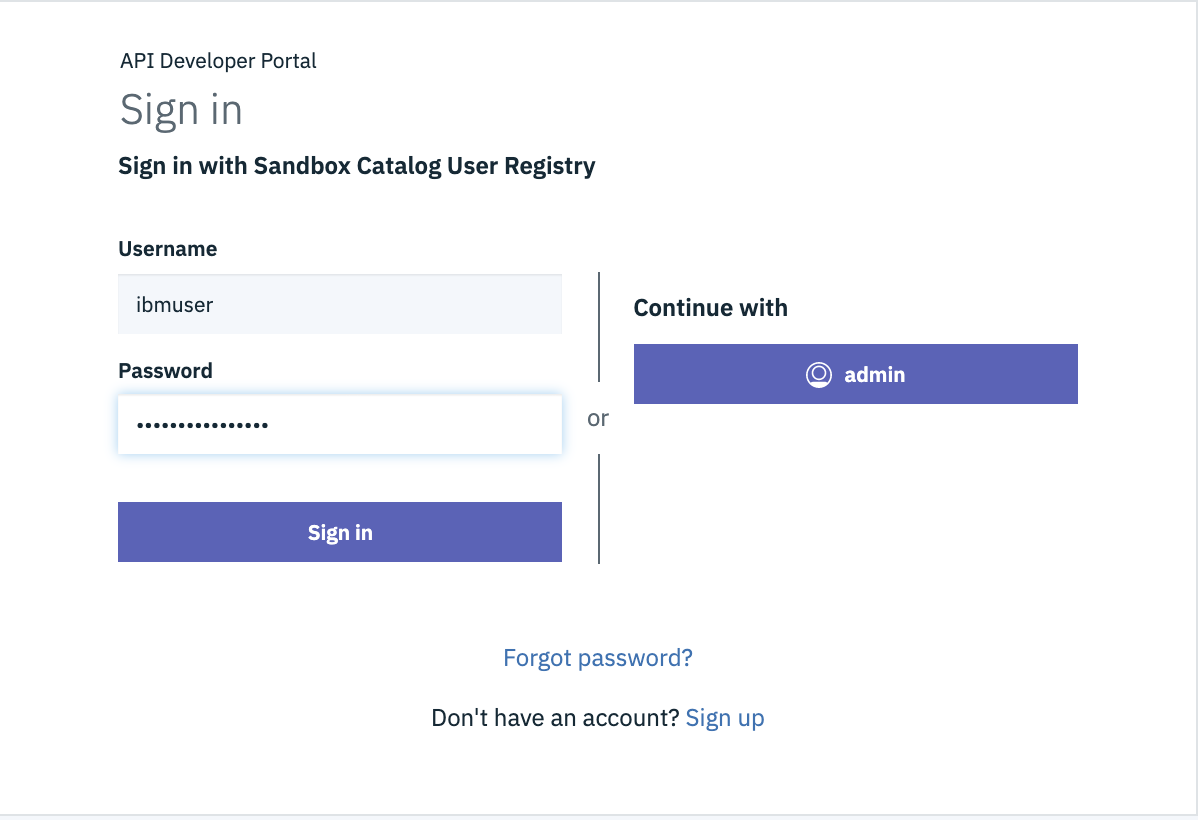
Click Sign in to login to the portal

-
Login to portal user using the username and password supplied in the email.
-
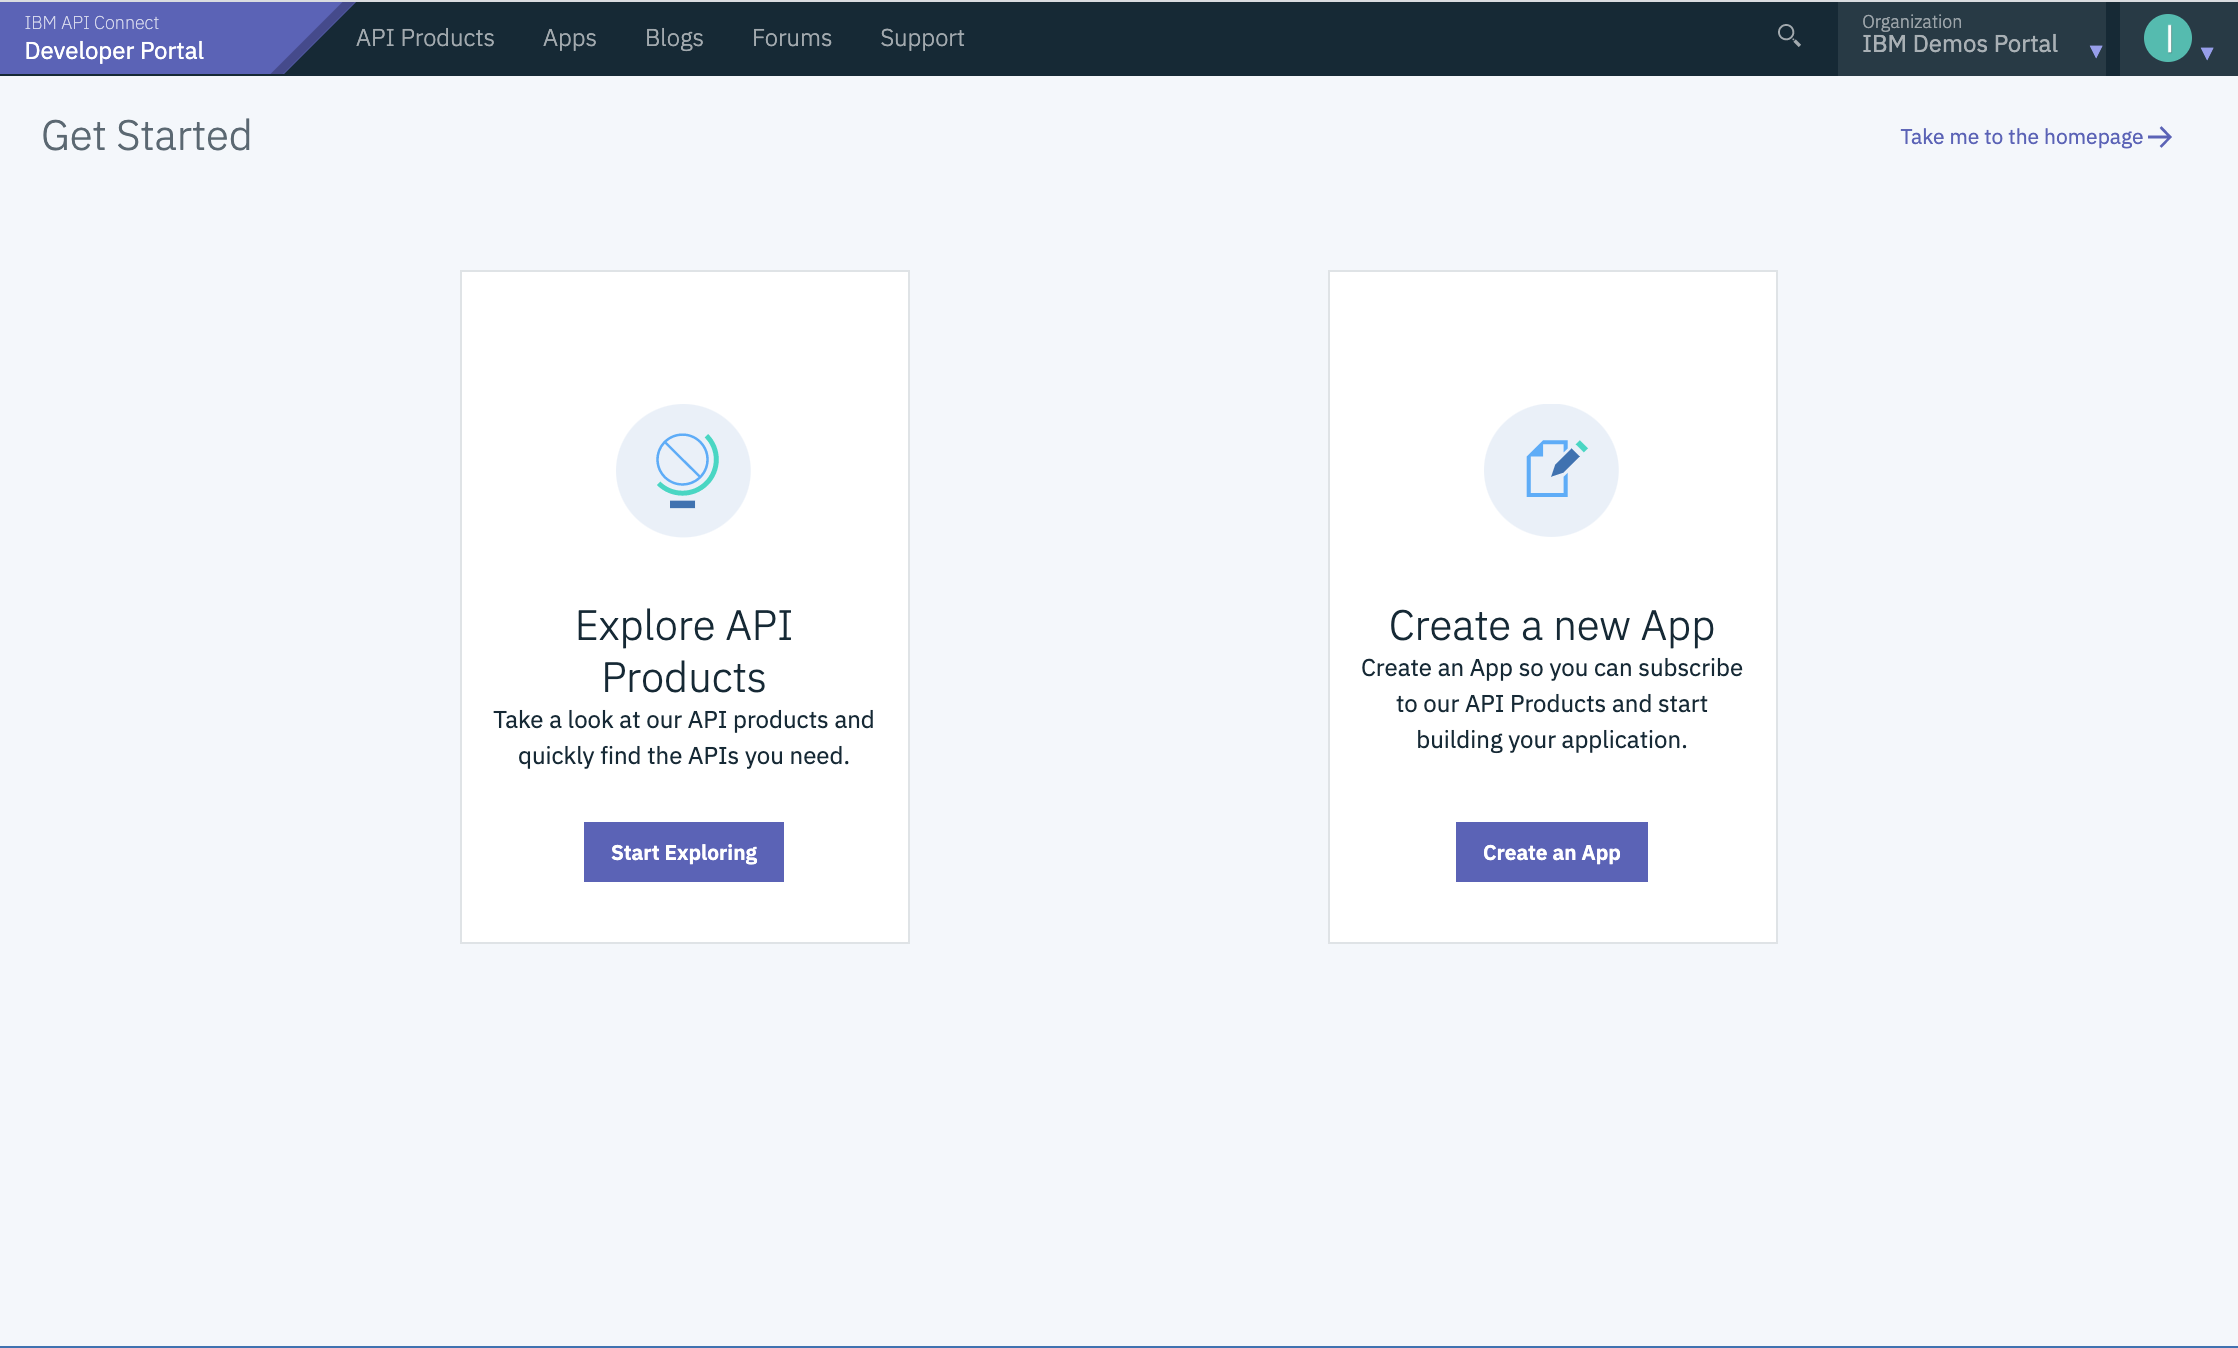
After successful login, you will see a Get Started page. Proceed to create a new Test application.
Register a test app
API Connect enforces entitlement rules to ensure that consumers are allowed to access the APIs that are being requested. The instructions below will guide you through registering your consumer application and subscribing it to an API Product.
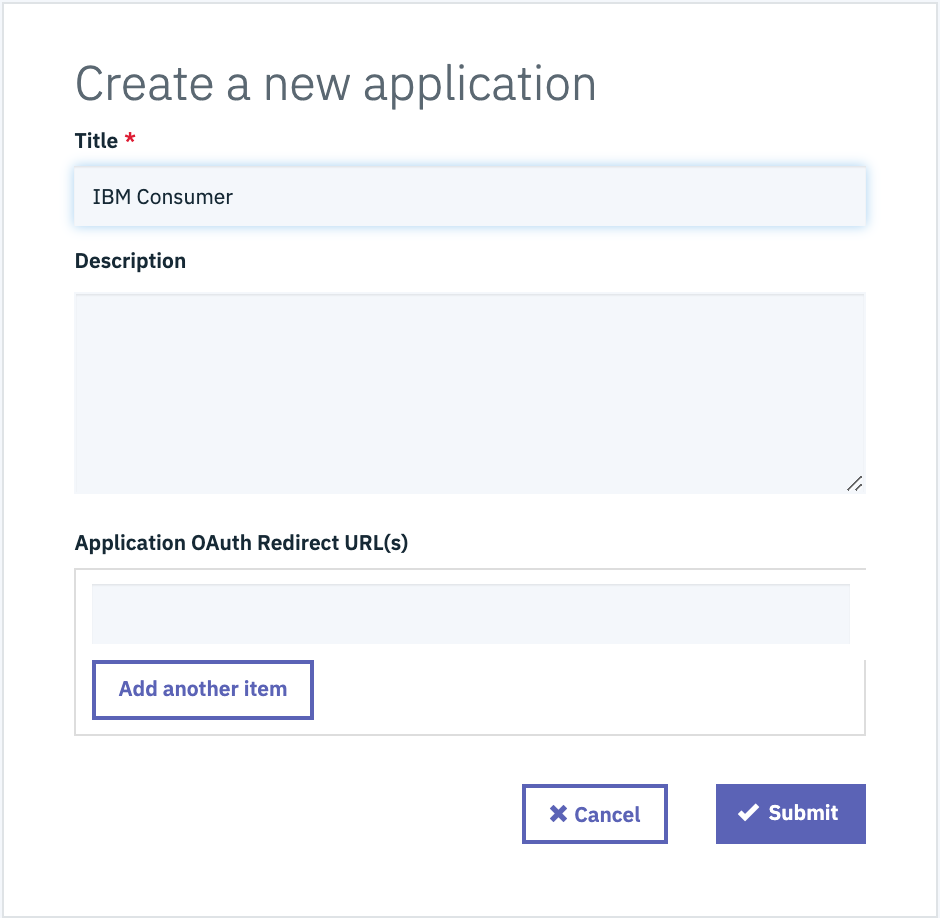
[Create A New Consumer Application]
-
Click [[Create an App]] in the Create a new App tile.
-
Give your application the title [IBM Consumer ] and then click [[Submit]].
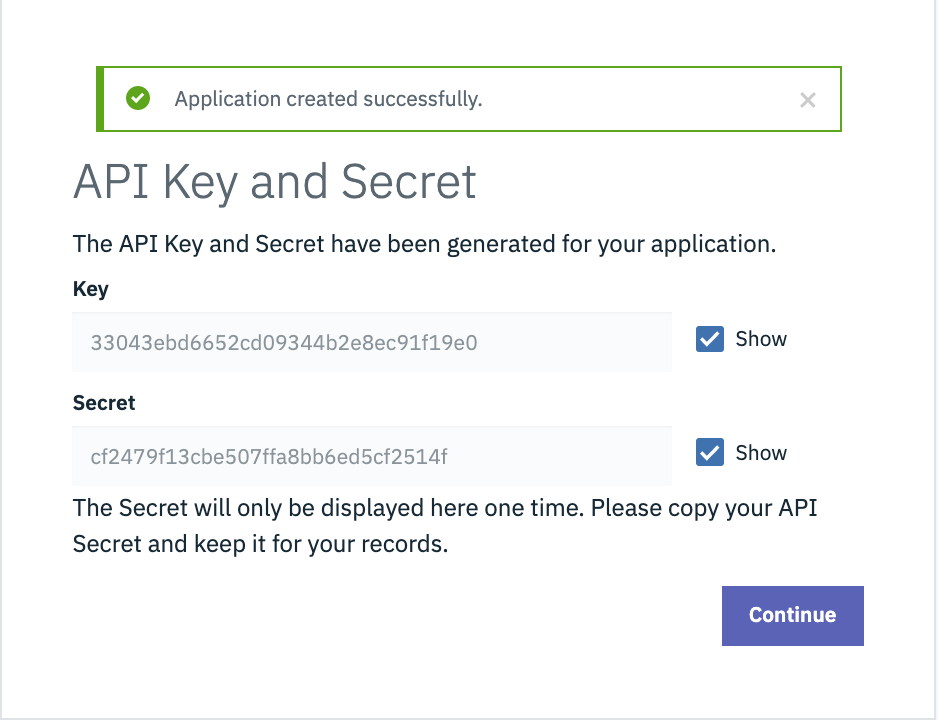
Save the Consumer Application Credentials
When your consumer application is registered in the IBM API Connect system, it is assigned a unique set of client credentials. These credentials must be provided on each API request in order for the system to validate your subscription entitlements.
-
Click the [[Show]] box in both Key and Secret to reveal it. Copy the Key and Secret. Save it to a text editor. Then click [[Continue. ]]You can always come back to view the Key. However, if you lose the Secret, you will need to generate a new one in the app settings.
-
Now you've entered the App Dashboard. Here you're able to see the analytics of your APIs.
Subscribe to the API Product
At this point, your registered consumer application has no entitlements. In order to grant it access to an API resource, you must subscribe to a Product and Plan.
-
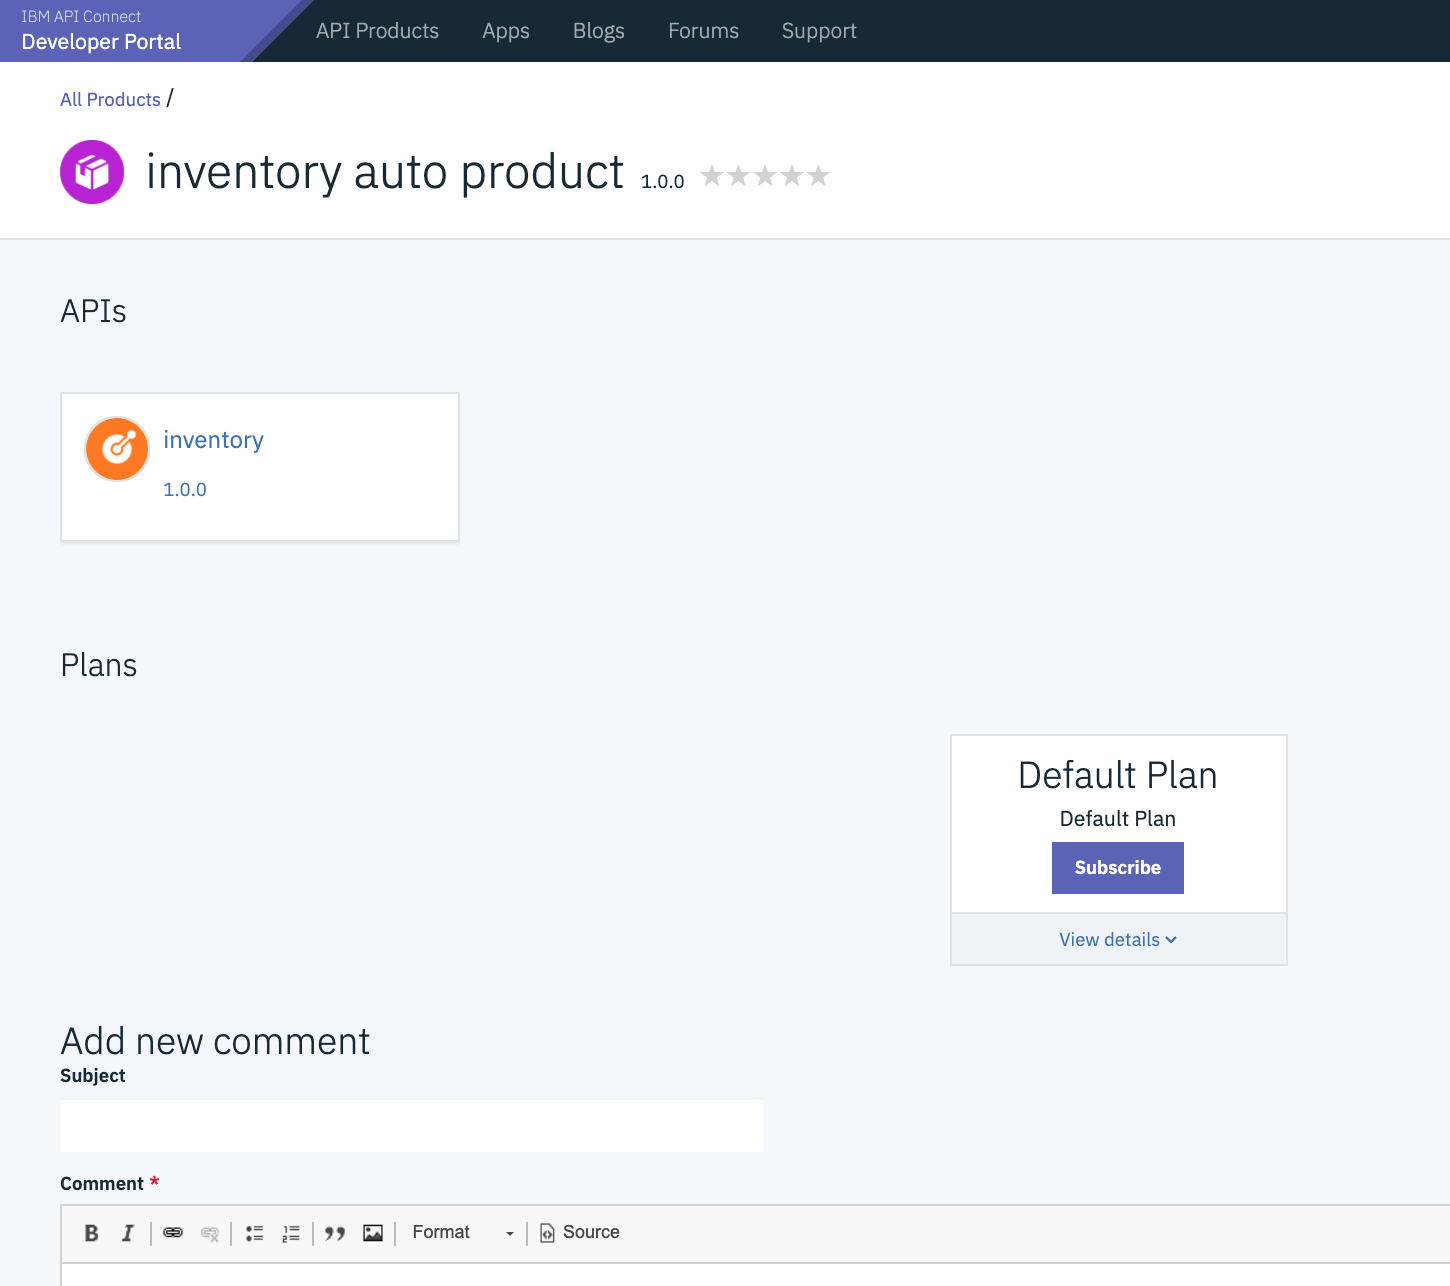
Click [[API Products]] at the top of the screen.
-
Click the [[inventory auto product 1.0.0]] product.
-
Click the [[Subscribe]] button for the default plan that is listed.
-
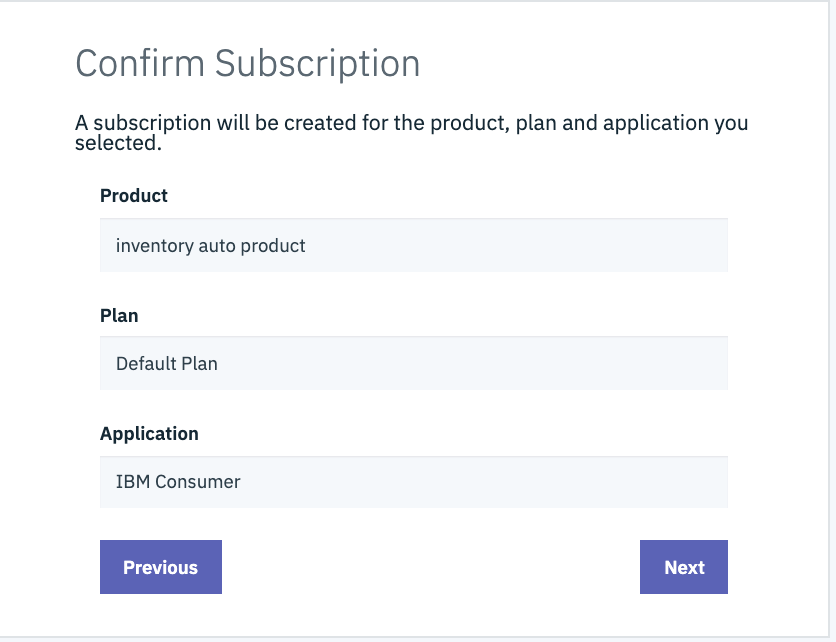
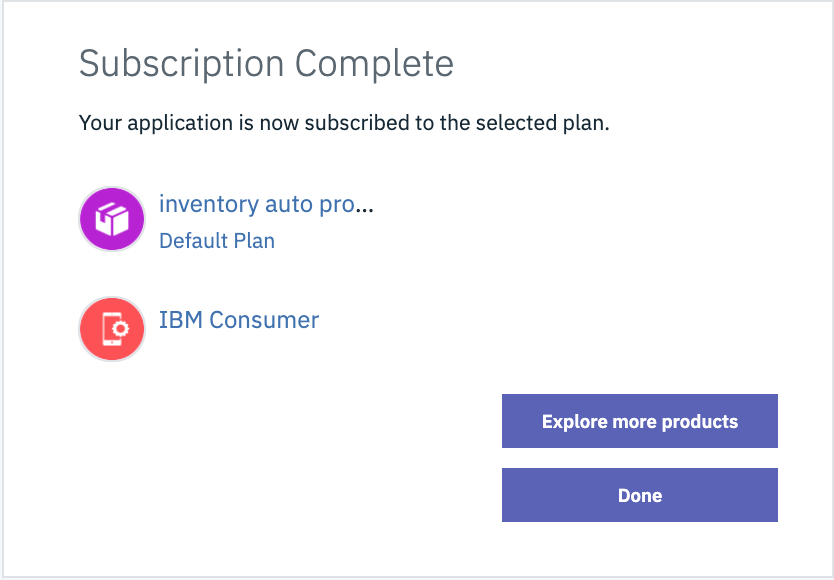
Follow the steps to Select your application, Confirm Subscription, and View Summary. Then click Done.
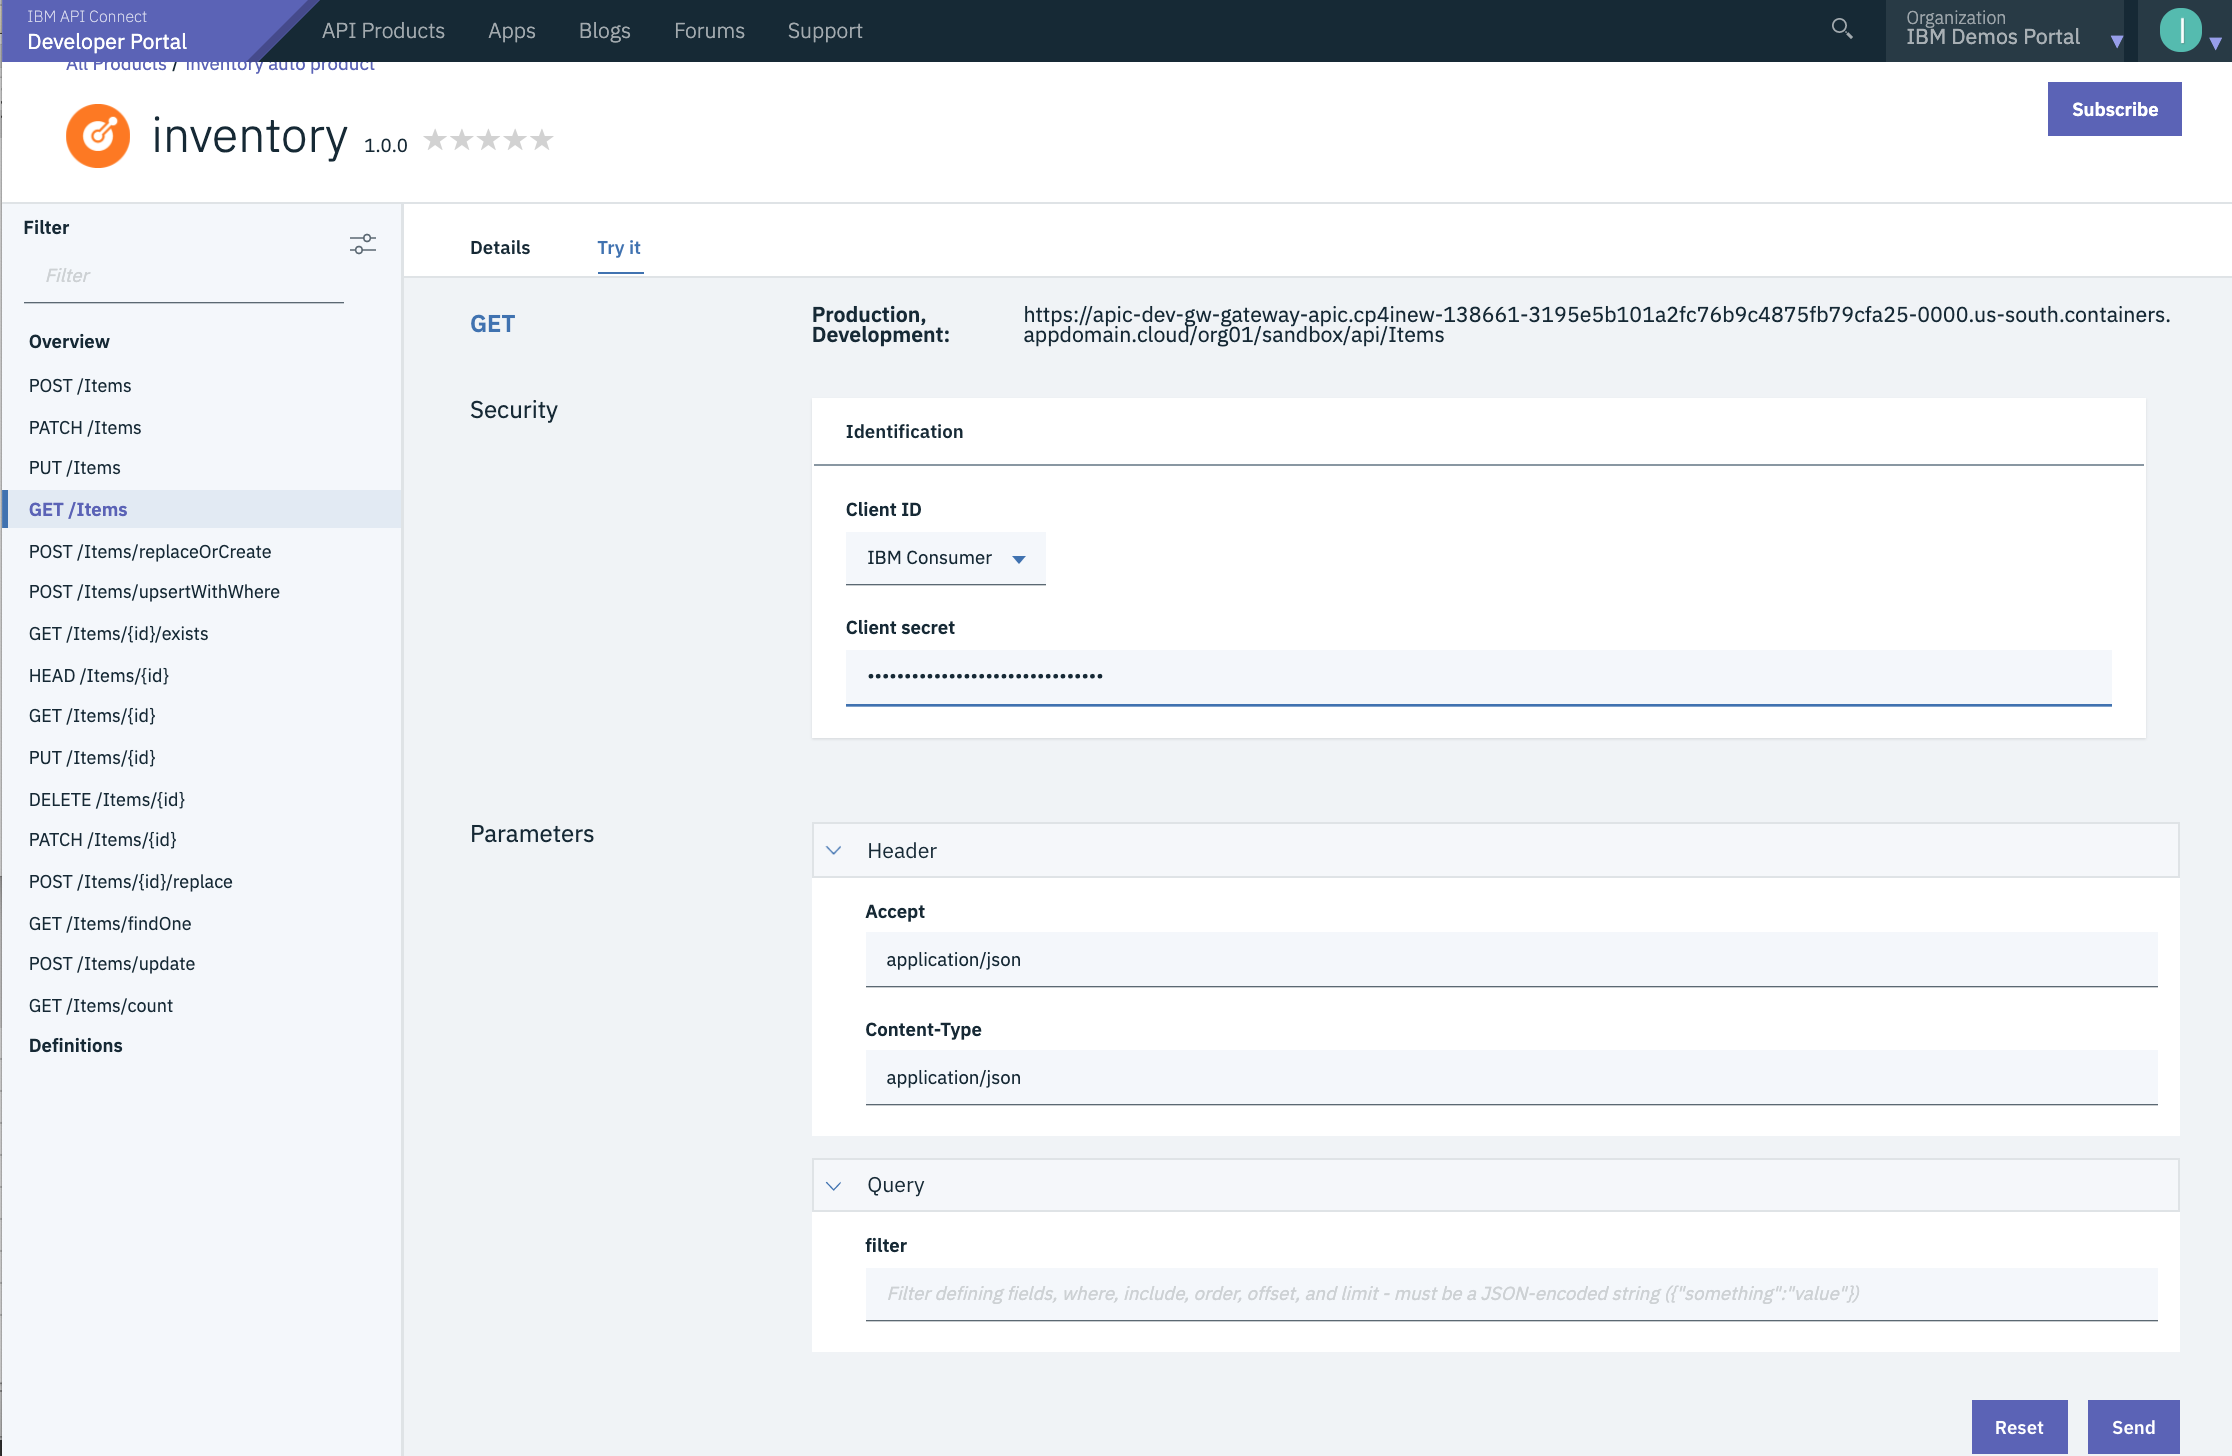
Test the API
The API Connect Developer Portal allows consumers to test the APIs directly from the website. This feature may be enabled or disabled per-API.
-
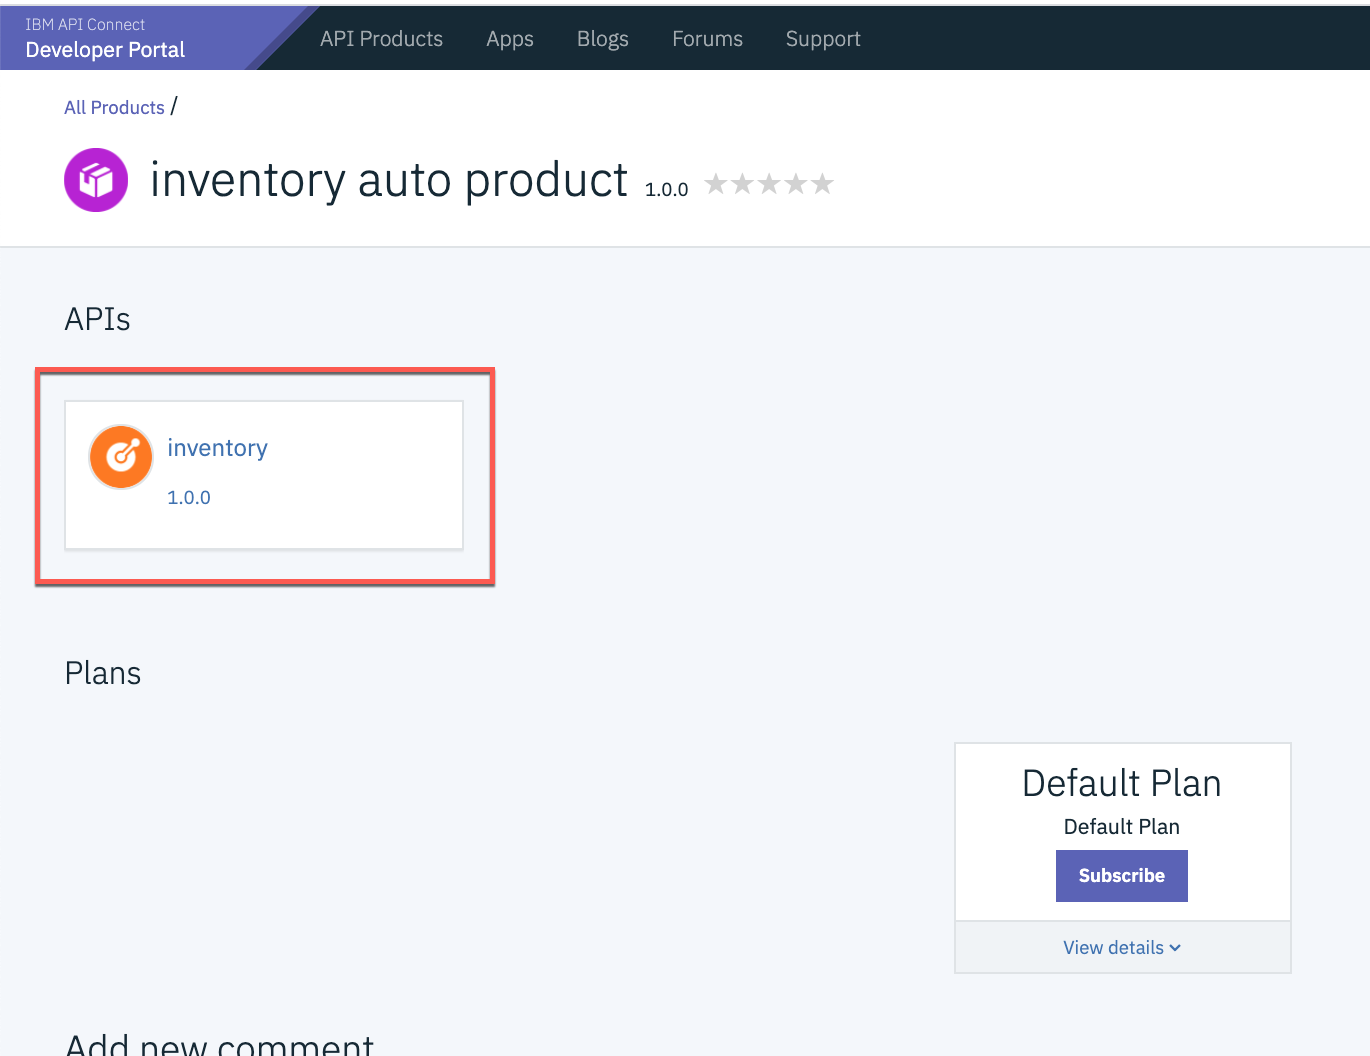
Open the inventory 1.0.0 API to browse the API definition.
-
Click the [[GET /Items]] operation on the left palette.
-
In the right column, you will find information about the request parameters and links to the response schemas.
-
Click the [[Try it]] tab.
-
If you only have one application registered, it will be automatically selected in the [Client ID] drop-down menu. If you have more than one, select the application which is subscribed to this API Product.
-
Paste your [Client Secret] into the provided field.
-
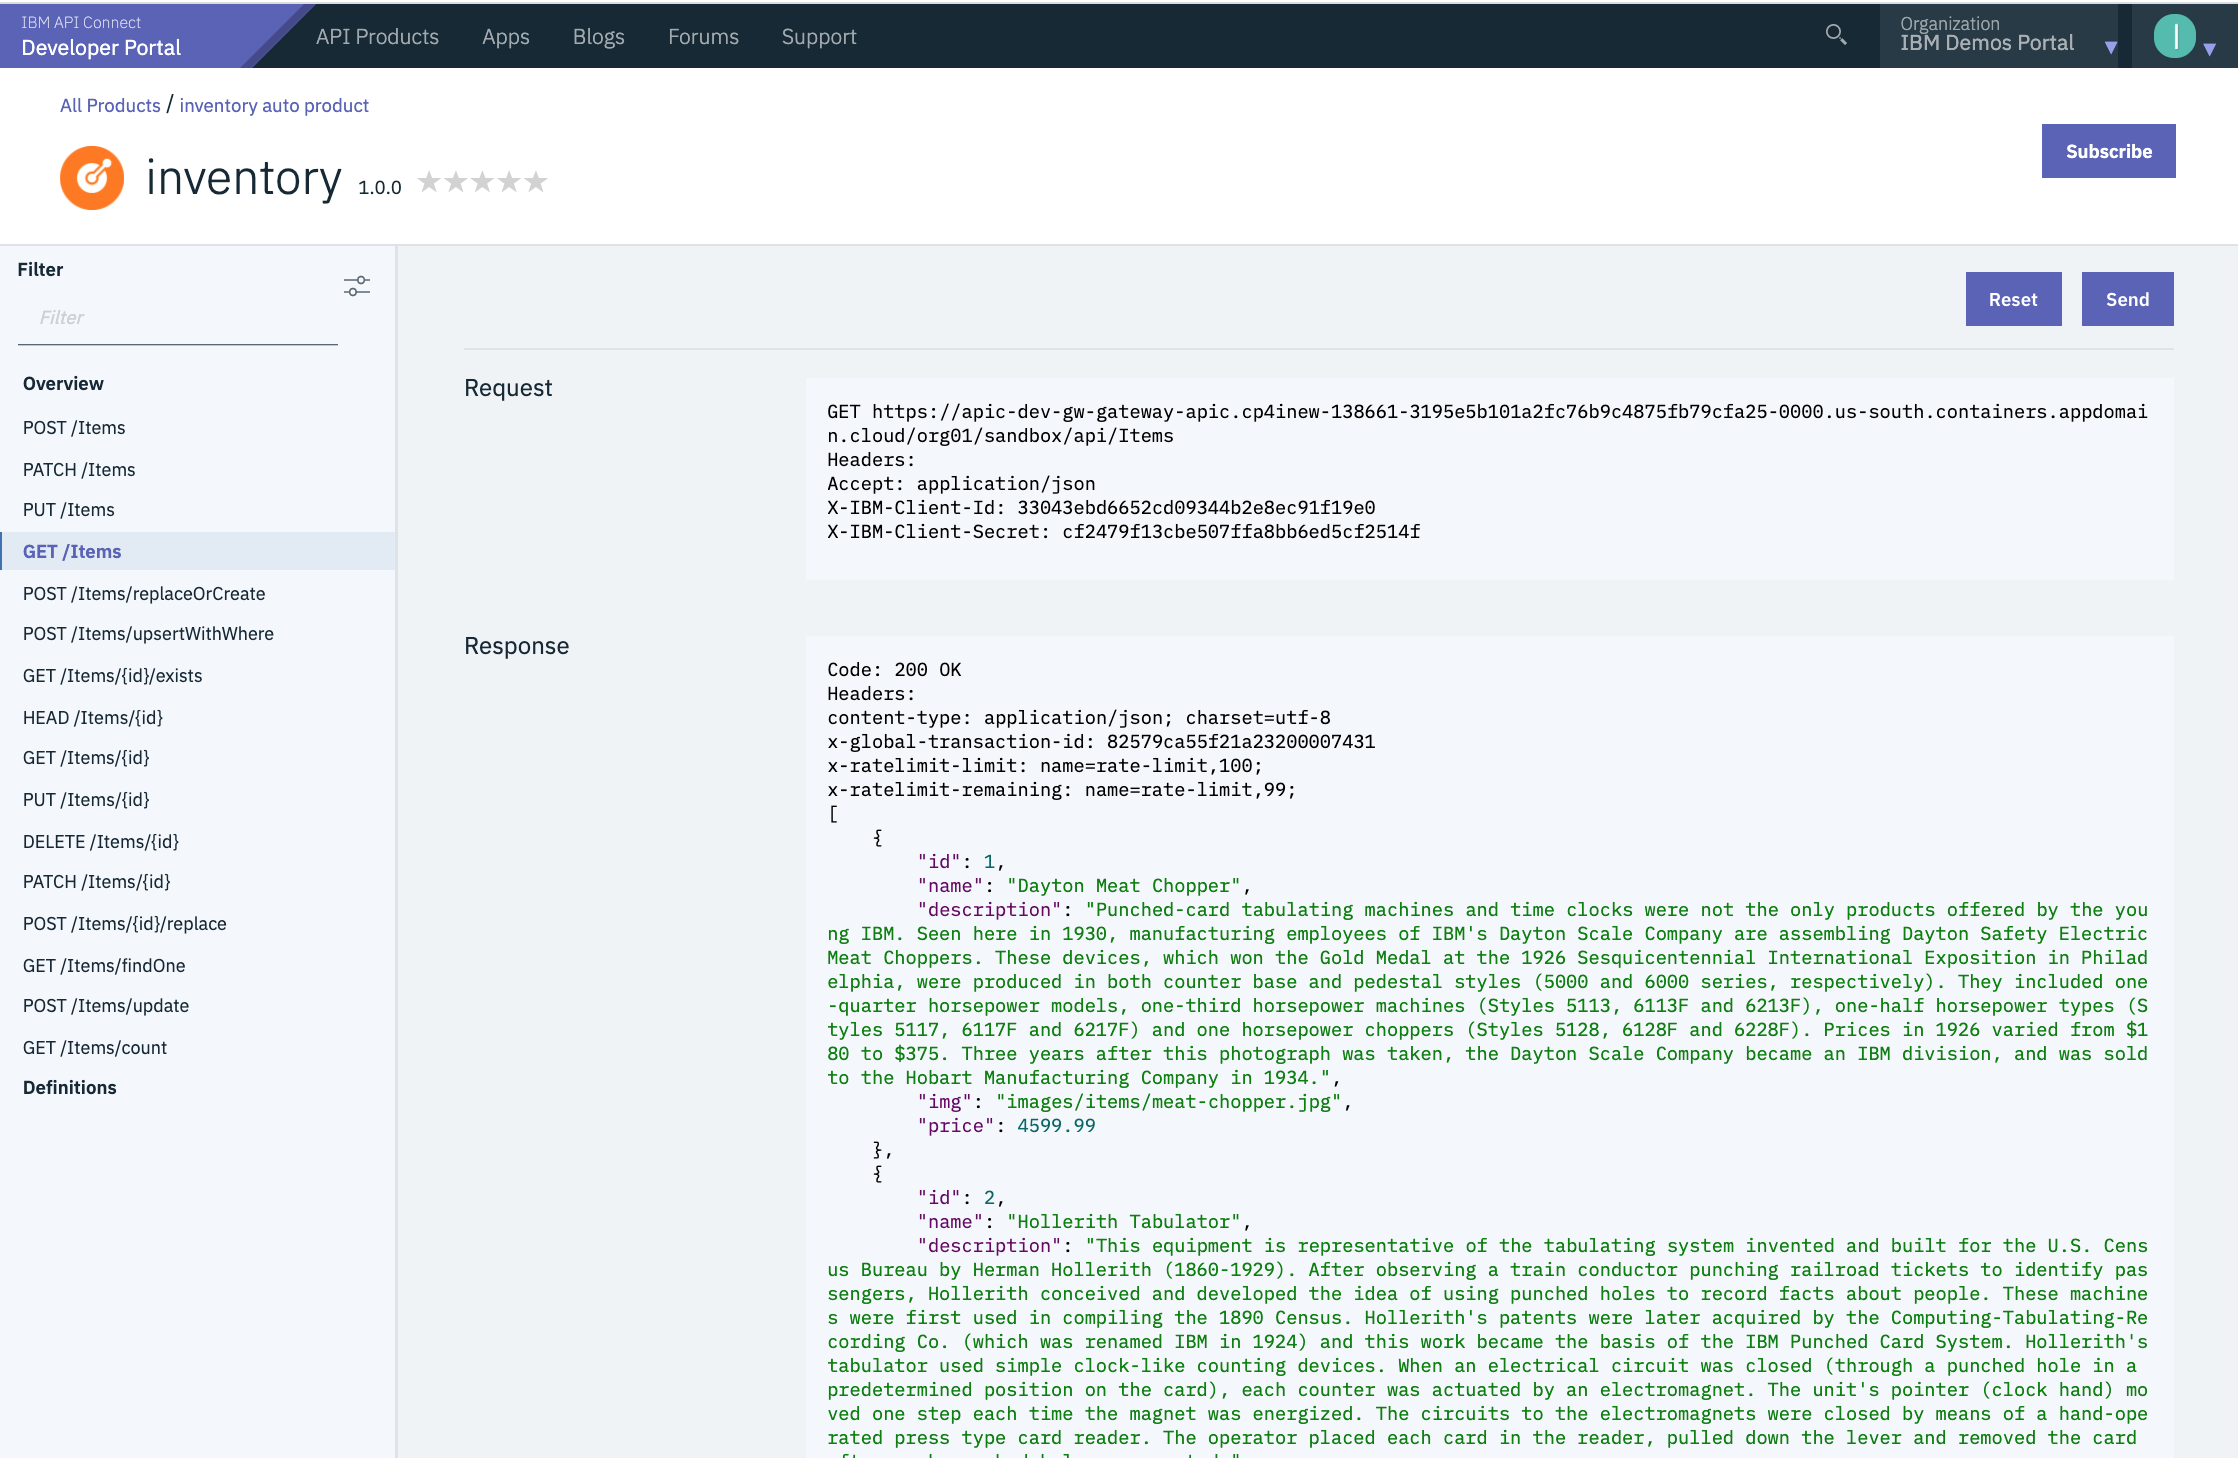
Click the [[Send]] button to invoke the API.
-
Scroll down to see the call results.
[Note: If running for the first time, you may see Code: 0 No response received. Causes include a lack of CORS support on the target server, the server being unavailable, or an untrusted certificate being encountered. Clicking the link below will open the server in a new tab. If the browser displays a certificate issue, you may choose to accept it and return here to test again.]
Summary
You completed the APIC Dev Jam Lab 2 - The Developer Portal Experience. Throughout the tutorial, you explored the key takeaways:
-
Configure Developer Portal and publish the APIs.
-
Create a Portal Account.
-
Create App and Subscribe to Plan
-
Test API in Developer Portal.
Continue the APIC Dev Jam! Go to APIC Dev Jam - Lab 3 - Add OAuth Security to your API to learn about configuring an OAuth provider service.