APIC Dev Jam - Lab 6 - Working with API Products
Your work as an Application Developer and API Designer is now complete. It’s time to switch roles and become an API Product Manager. The role of the API Product Manager is to take the developed assets and bundle them together using a go-to-market strategy.
In this case, you will publish the APIs from the accessories project together as a bundled product offering to API Consumers. Additionally, you will create two plans which have different levels of access to your APIs.
In this tutorial, you will explore the following key capabilities:
-
Create a Product
-
Attach APIs to a Product
-
Create a Plan
-
Publish a Product
APIC Dev Jam Series
The APIC Dev Jam Series is a hands-on workshop with lab exercises that walk you through designing, publishing, and securing APIs. This workshop is for API developers, architects, and line of business people who want to create a successful API strategy. There are 8 labs and each is 30 minutes long. Make sure you choose enough time in your reservation to get through all the labs!
[NOTE: ][This demo environment contains a full API Connect installation in Cloud Pak for Integration. The login information to the APIC cluster will be sent in a separate email when you reserve the instance. Use Google Chrome, Firefox or Microsoft Edge to access the cluster using the credentials supplied. Make sure you login using API Manager User Registry not Common Services registry.]
Lab 1 : Create and Secure an API to Proxy an Existing REST Web service
Lab 2 : The Developer Portal Experience
Lab 3 : Add OAuth Security to your API
Lab 4 : Use Lifecycle Controls to Version Your API
Lab 6: Working with API Products
Lab 7: The Consumer Experience
Lab 8: Create and test GraphQL Proxy API
Prerequisites: Labs 1-5
Create an API Product
Before being published, APIs are packaged into Products. In Lab 4, you saw how to create a new Product. In this section, you will create another new Product for the accessories APIs, as well as create two new Plans to which consumers can subscribe.
-
Go to the Develop home page.
-
Click [[Add. ]]Select [[Product]].
-
Select [New product].
-
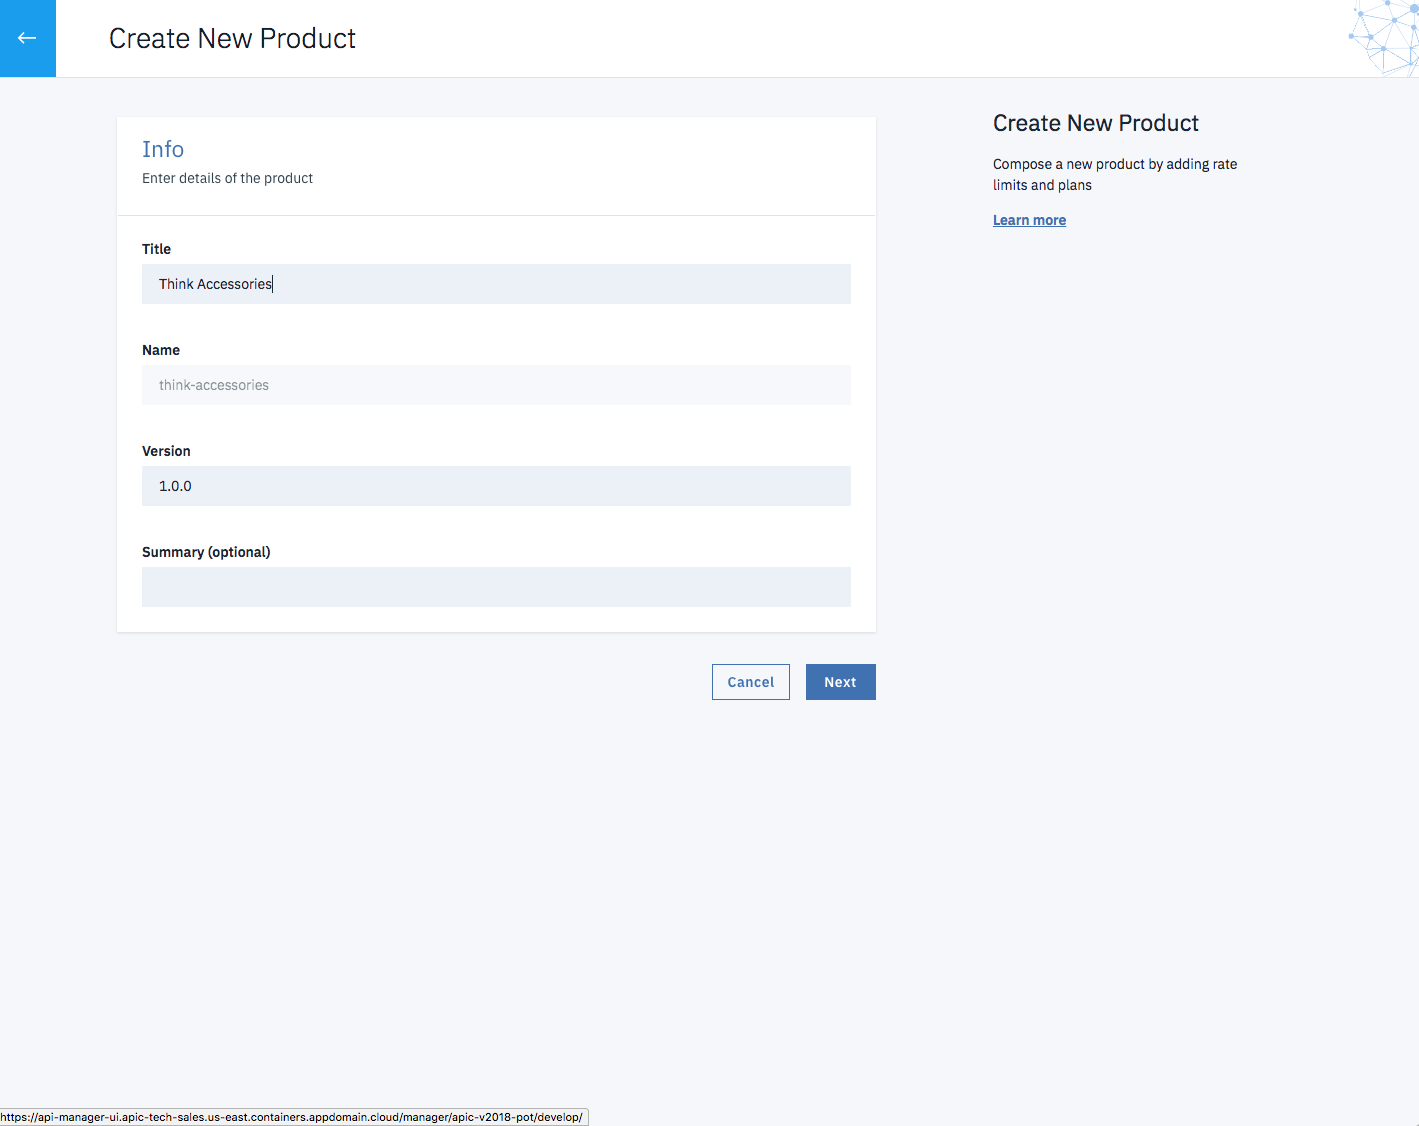
Provide the following configuration for the new product:
Title: [[Accessories]]
Name: [[accessories]]
-
Click [Next].
-
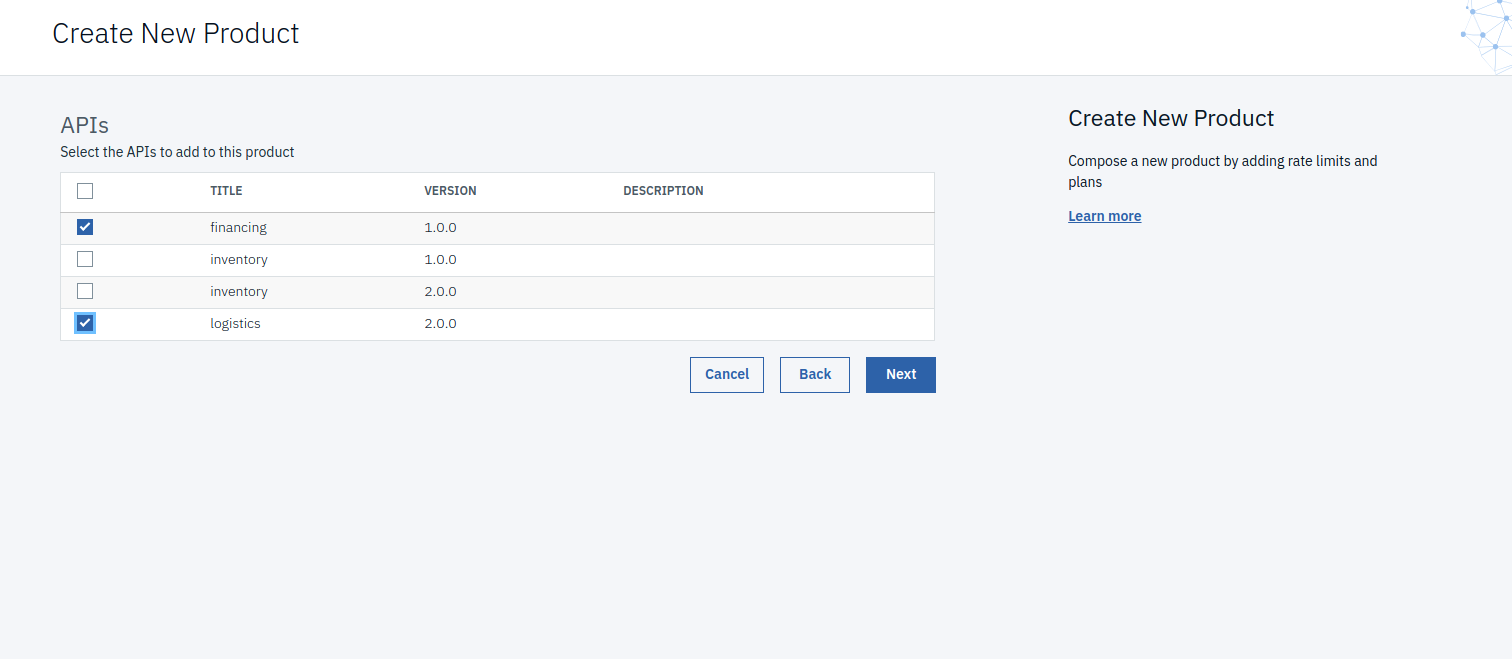
Select the checkboxes next to [financing] and [[logistics]]. Then click [[Next]].
-
Provide the following Plan details:
Title: [Silver]
Description: [Limited access to the Accessories APIs]
Keep rate limit of 100 with an interval of 1 hour
-
Click [[Next]].
-
Modify the Visibility so that the product is only visible to [[Authenticated users]]. Then click [[Next]].

-
The product has been created! Click [[Edit Product]] to make changes.

-
In the Product Setup section, specify the following details:
Summary: [[The Accessories product will provide really awesome APIs to your application.]]
Contact Name: Thomas Watson

Contact Email: watson@ibm.com

Contact URL: https://developer.ibm.com/apiconnect/
-
Specify a License and Terms of Service:
License Name: [[The MIT License (MIT)]]
License URL: [[https://opensource.org/licenses/MIT]]
Terms of Service: paste the contents of the box below:
[[Copyright (c) 2016 IBM Permission is hereby granted, free of charge, to any person obtaining a copy of this software and associated documentation files (the \"Software\"), to deal in the Software without restriction, including without limitation the rights to use, copy, modify, merge, publish, distribute, sublicense, and/or sell copies of the Software, and to permit persons to whom the Software is furnished to do so, subject to the following conditions: The above copyright notice and this permission notice shall be included in all copies or substantial portions of the Software. THE SOFTWARE IS PROVIDED \"AS IS\", WITHOUT WARRANTY OF ANY KIND, EXPRESS OR IMPLIED, INCLUDING BUT NOT LIMITED TO THE WARRANTIES OF MERCHANTABILITY, FITNESS FOR A PARTICULAR PURPOSE AND NONINFRINGEMENT. IN NO EVENT SHALL THE AUTHORS OR COPYRIGHT HOLDERS BE LIABLE FOR ANY CLAIM, DAMAGES OR OTHER LIABILITY, WHETHER IN AN ACTION OF CONTRACT, TORT OR OTHERWISE, ARISING FROM, OUT OF OR IN CONNECTION WITH THE SOFTWARE OR THE USE OR OTHER DEALINGS IN THE SOFTWARE.]] -
Scroll to the bottom and click [[Save]].
-
Navigate to the Plans section. Click the Add button to add a new plan.
-
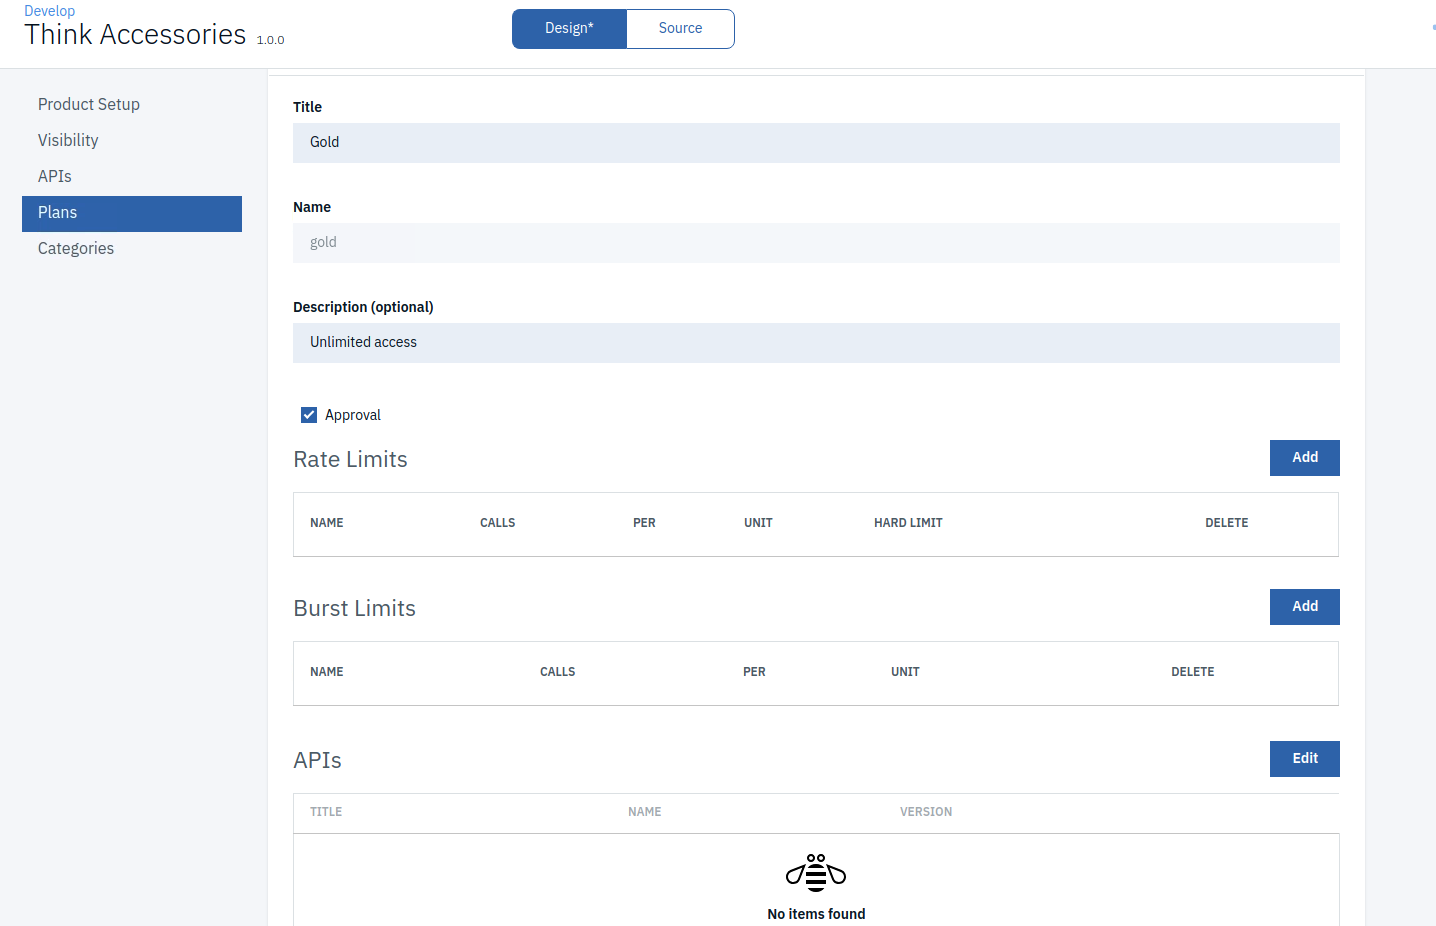
Fill in the following details:
Title: [[Gold]]
Description: [Unlimited access to the Accessories APIs for approved users]
Approval: check
Rate Limits: Click unlimited on rate to make this plan unlimited.
Burst Limits: Delete the default burst-limit.
-
Save your changes. Then click [[Develop]] in the main menu on the left.
Publish the API Product
Publish the Accessories Product and make it ready for consumers.
-
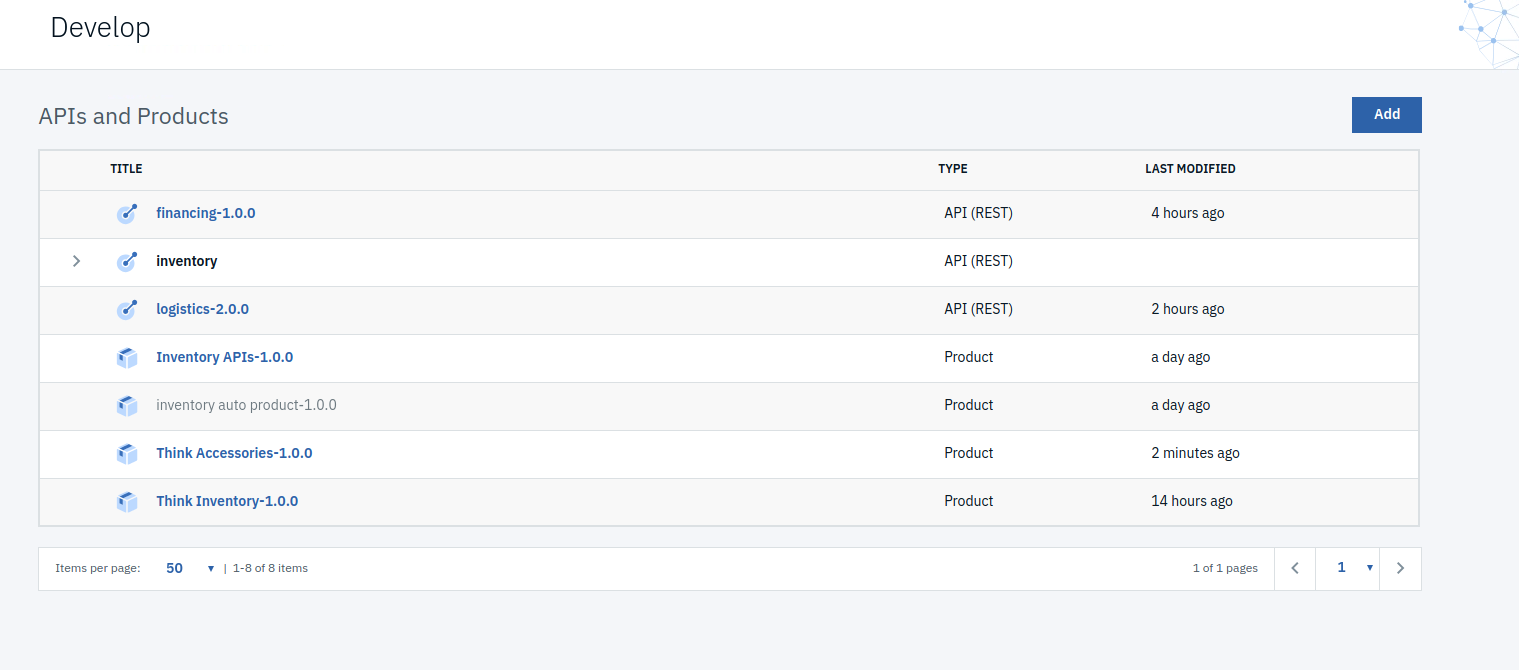
On The Develop page, you should see the Accessories-1.0.0 Product in the list.
-
Click the [[3 dot menu button]] in the row for Accessories-1.0.0.

-
Click [[Publish.]]
-
The Sandbox catalog is already selected. Click [Publish].
Summary
Congratulations! You have successfully configured and published a new product with multiple APIs. Throughout the tutorial, you explored the key takeaways:
-
Create a product.
-
Attach APIs to a product.
-
Create a plan.
-
Publish a product.
Continue with the APIC Dev Jam! Go to APIC Dev Jam - Lab 7 - The Consumer Experience)] to explore the consumer experience for APIs that have been exposed to your Sandbox catalog.