APIC Dev Jam Lab 3 - Add OAuth Security to your API
In this lab, you will secure the Inventory API to protect the resources exposed by API Connect. Consumers of your API will be required to obtain and provide a valid OAuth token before they can invoke the Inventory API.
In this tutorial, you will explore the following key capabilities:
-
Configure an OAuth 2.0 service, the Resource Owner Password grant type.
-
Clone a new version of an API.
-
Secure the new version of your API.
APIC Dev Jam Series
The APIC Dev Jam Series is a hands-on workshop with lab exercises that walk you through designing, publishing, and securing APIs. This workshop is for API developers, architects, and line of business people who want to create a successful API strategy. There are 8 labs and each is 30 minutes long. Make sure you choose enough time in your reservation to get through all the labs!
[NOTE: ][This demo environment contains a full API Connect installation in Cloud Pak for Integration. The login information to the APIC cluster will be sent in a separate email when you reserve the instance. Use Google Chrome, Firefox or Microsoft Edge to access the cluster using the credentials supplied. Make sure you login using API Manager User Registry not Common Services registry.]
Lab 1 : Create and Secure an API to Proxy an Existing REST Web service
Lab 2 : The Developer Portal Experience
Lab 3 : Add OAuth Security to your API
Lab 4 : Use Lifecycle Controls to Version Your API
Lab 6: Working with API Products
Lab 7: The Consumer Experience
Lab 8: Create and test GraphQL Proxy API
Prerequisites: Labs 1-2
Configure a New OAuth 2.0 Provider API
API Connect is a full-featured OAuth 2.0 provider. The OAuth exchange works like any other API call, and thus we treat it as its own API. In this section, you will create a new OAuth provider API, configure which grant type to use, and configure how it will authenticate user credentials.
Configure Authentication URL User Registry
In order to configure user authentication, you must first define the registry to use, which may be LDAP, local user registry, or an authentication URL. For our lab, we will implement an Authentication URL.
-
In the API Manager from the main menu on the left, click [[Resources]].
-
Select the [[Authentication URL User Registry]] tile.

-
Specify the only following properties and then click [[Save.]]
Title: [[App Registry]]
URL: https://thinkibm-services.mybluemix.net/auth
Display name:[[ App Registry]]
Click Save to save the resource

Create OAuth Service
-
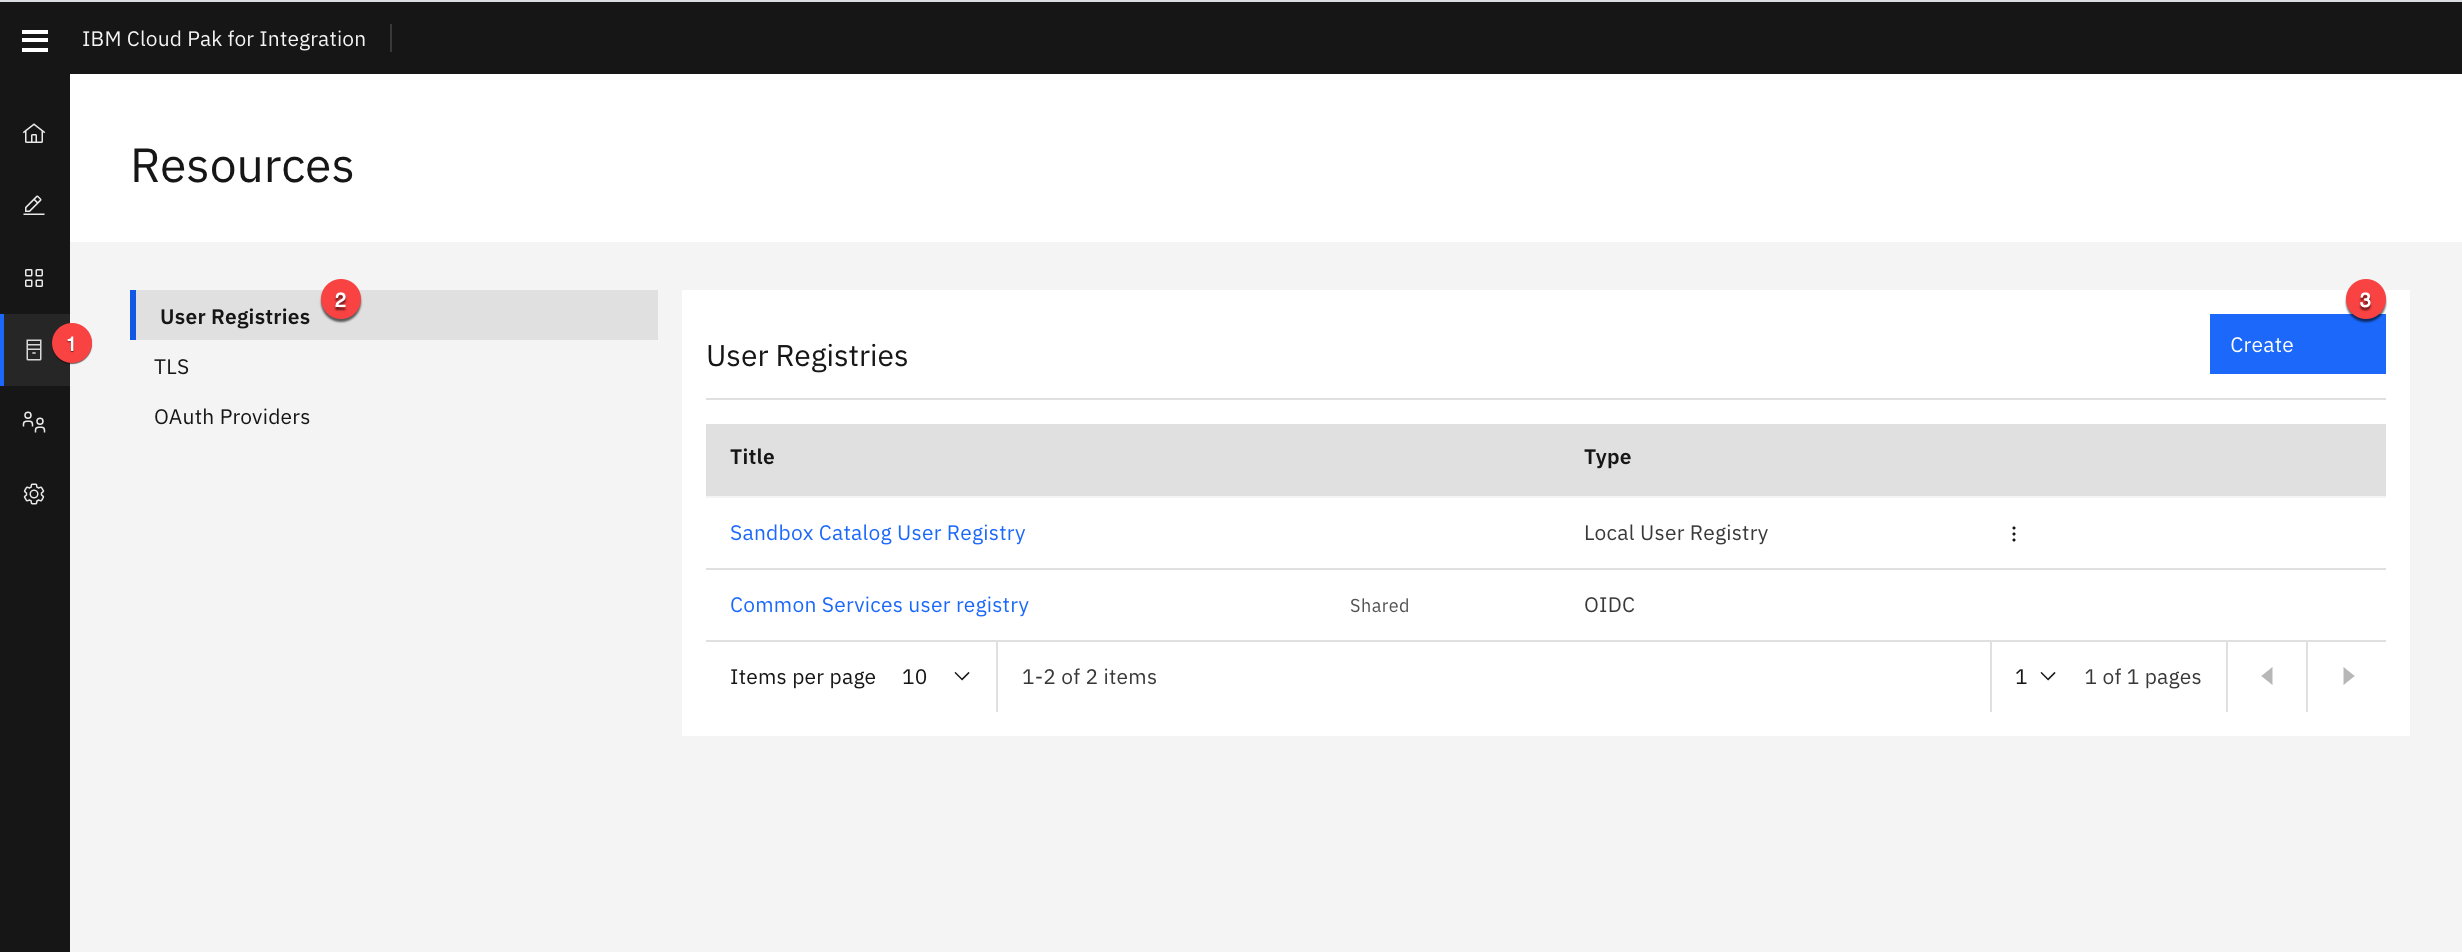
In the API Manager from the main menu on the left, click [[Resources]].
-
In the Resources menu, click [[OAuth Providers-> Native OAuth Provider]].

-
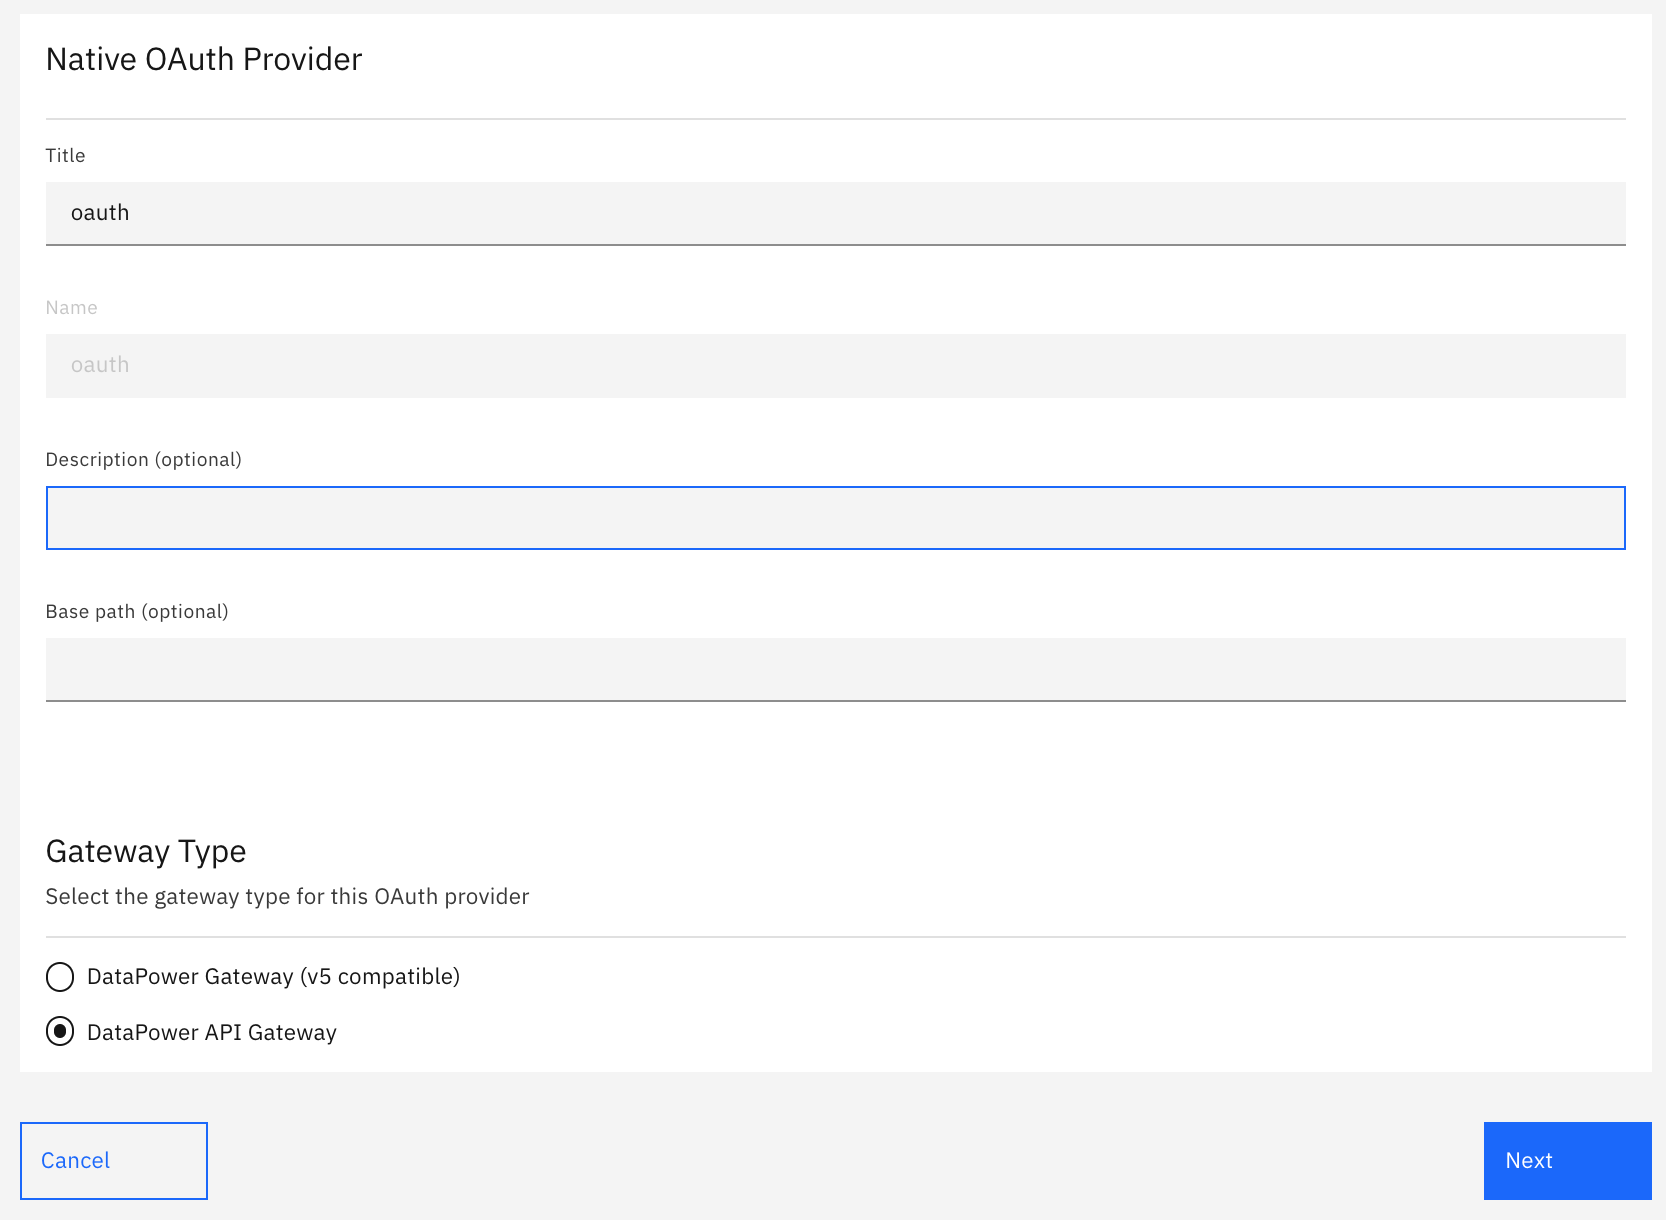
Specify the following properties and click [Next] to continue.
Title: [[oauth]]
Name: [[oauth]]
Gateway Type: [[DataPower API Gateway]]
-
The next configuration screen will display the default paths to the Authorize and Token functions. For Supported grant types, choose [[Resource owner password]]. For Supported Client types, choose [[Confidential]]. Click [[Next]] continue.

-
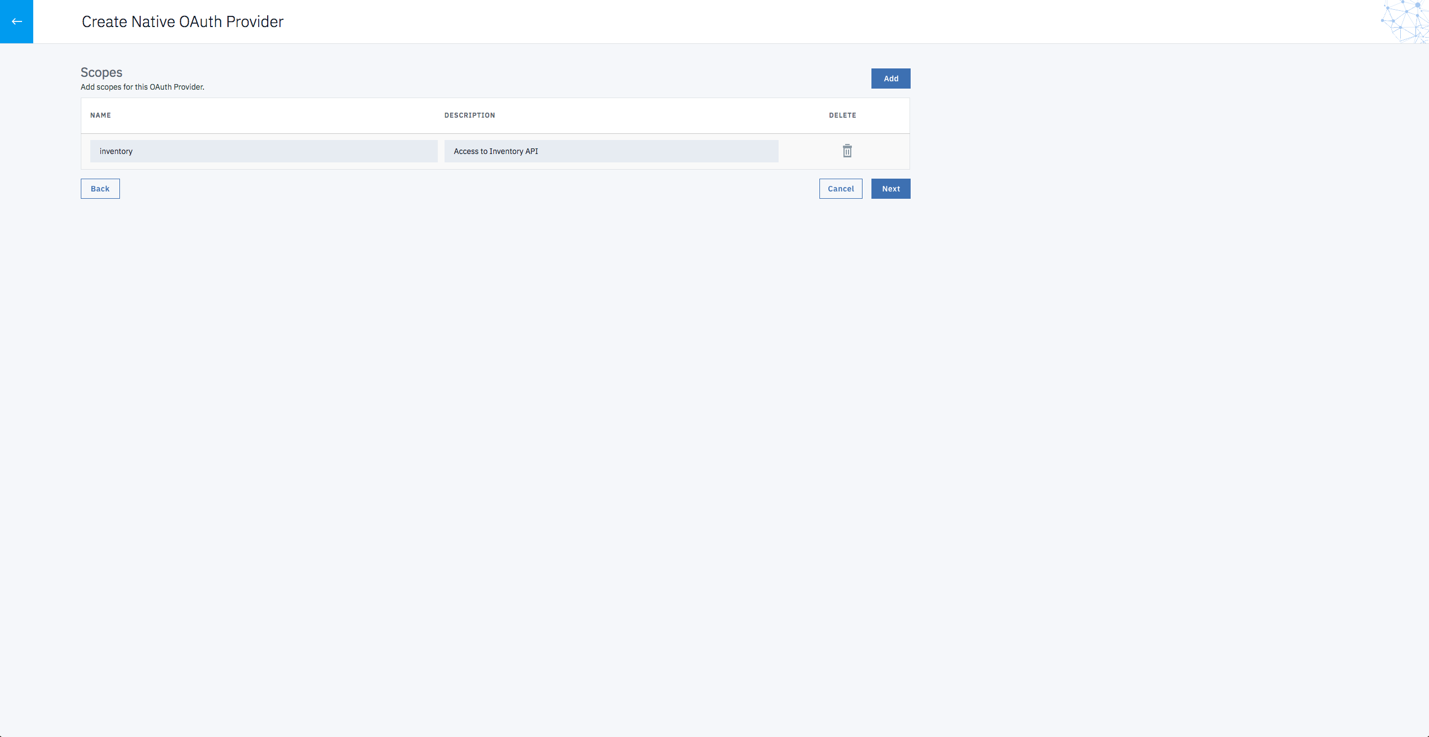
One scope is generated for you : [[sample_scope_1][.]]
-
Modify the values for [sample_scope_1], set the following fields:
Name: [[inventory]]
Description: [[Access to Inventory API]]
-
Click [[Next]].
-
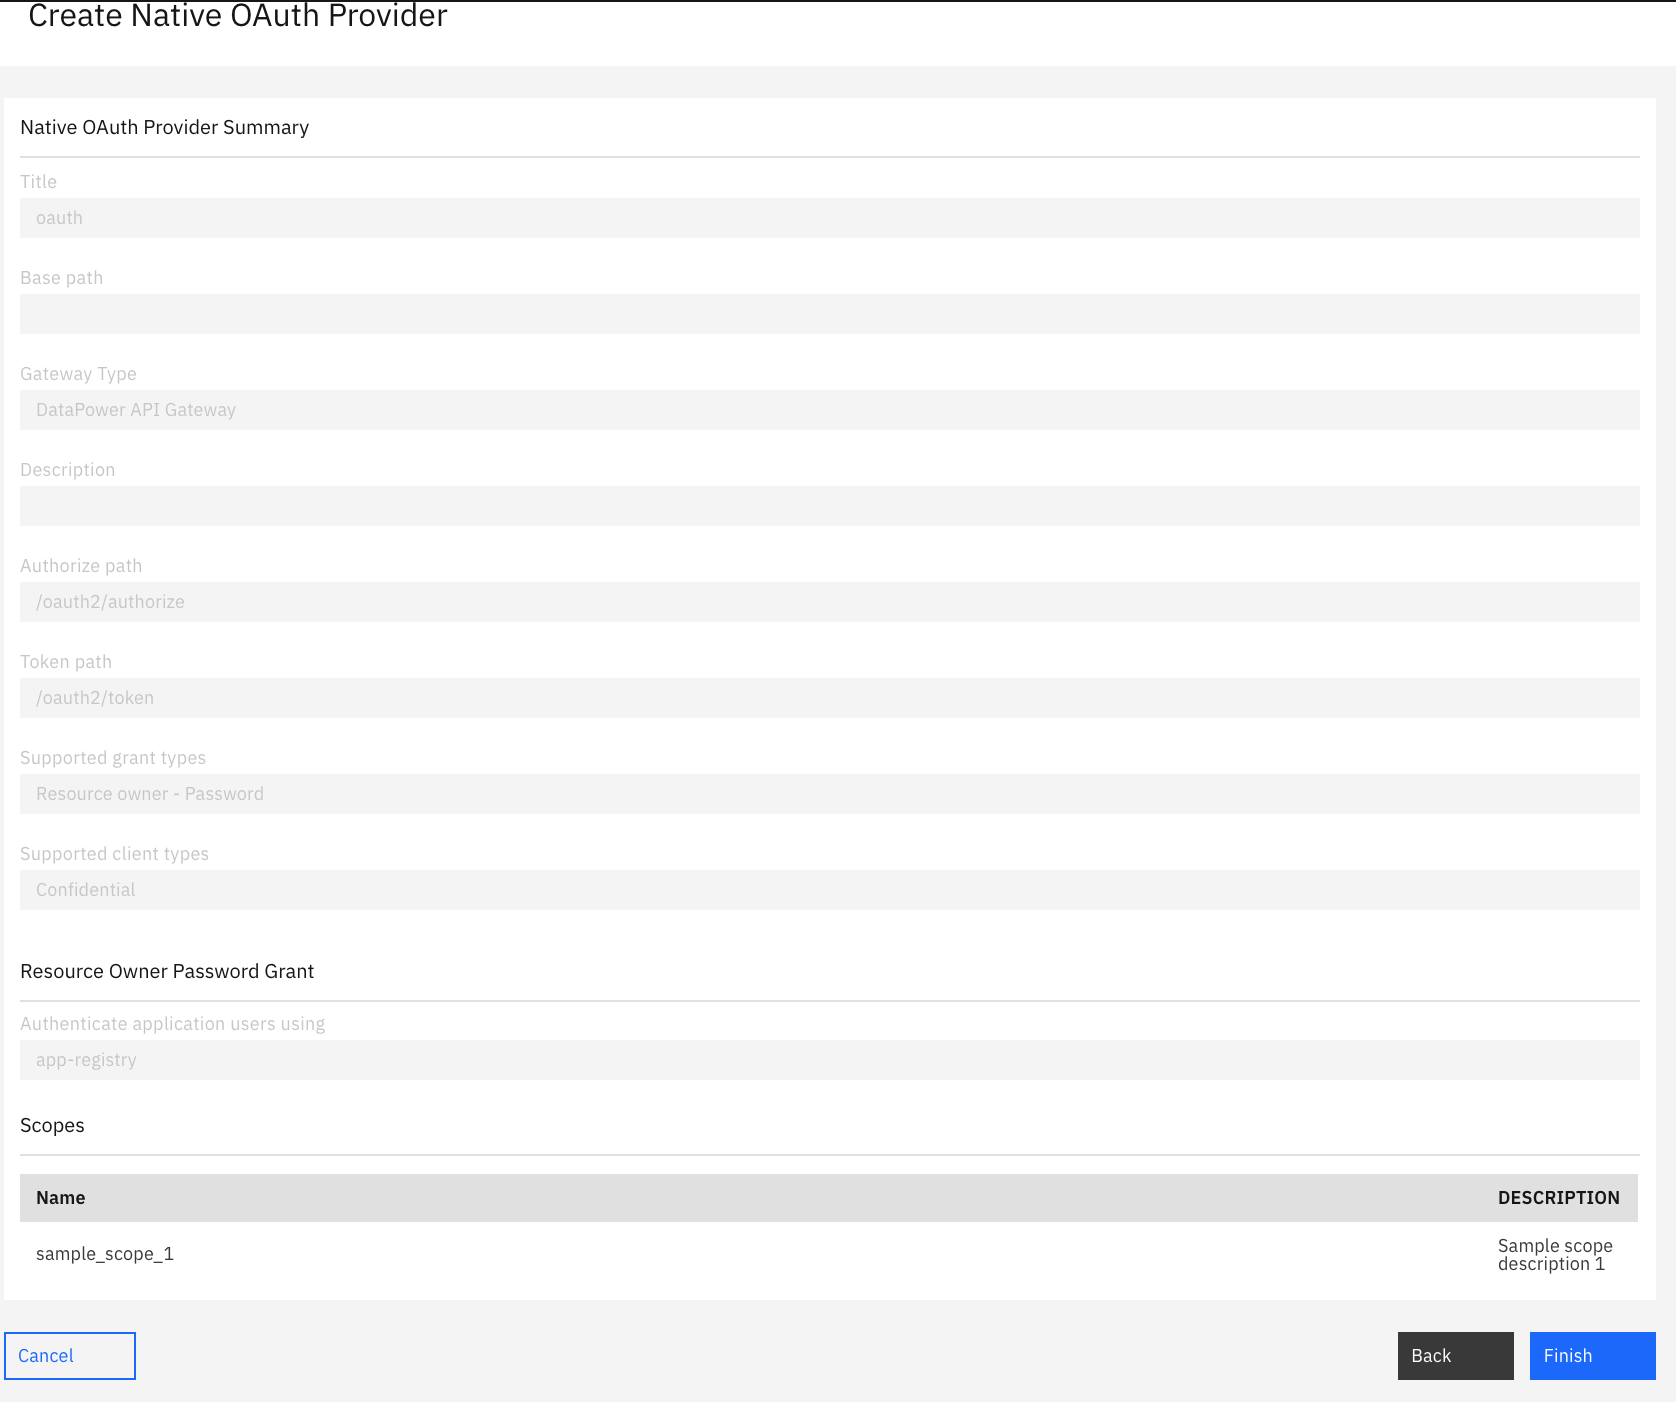
Keep all items default. Click [[Next.]]
-
Review your OAuth configuration and click [[Finish]]. Then click on the back arrow.
-
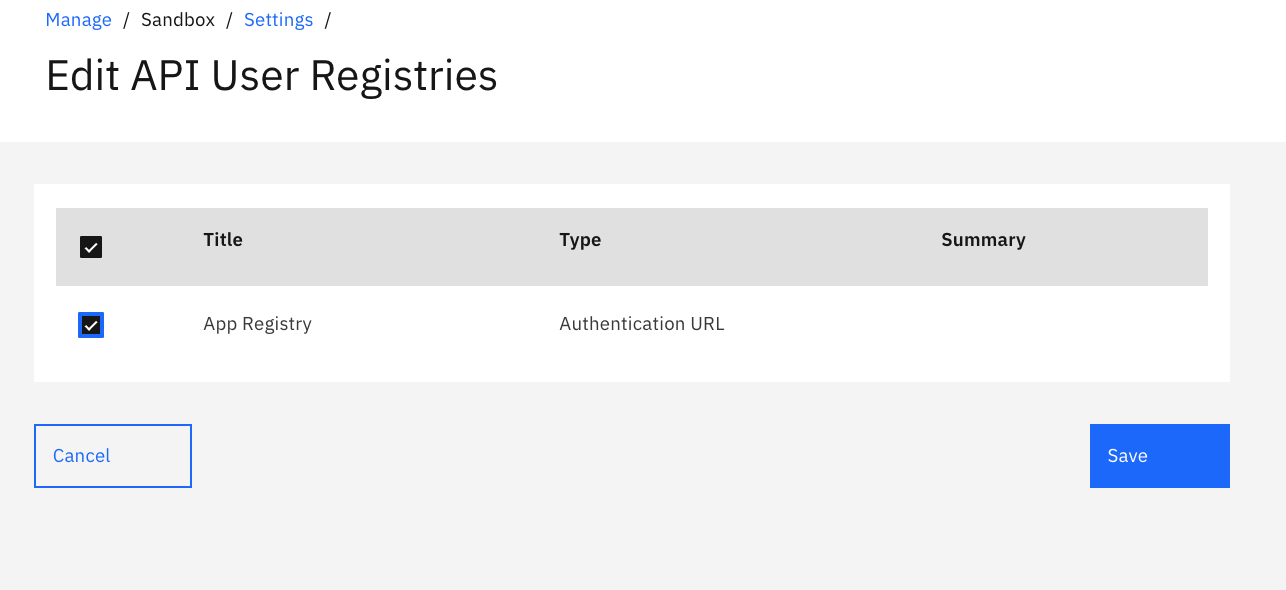
From the Sandbox Catalog registry setting, select API User Registries and Add App Registry. To open Sandbox Settings follow Home->Manage Catalogs->Sandbox->Settings(Gearbox)->API User Registries.
Use Edit option and enable available API registry.
Add the OAuth Service to the Sandbox Catalog
-
From the left menu, click [[Home Button Icon]].
-
Click the [[Manage Catalog]] catalog and select [[Sandbox]]
-
From the left menu, click [[Settings]] gearbox.
-
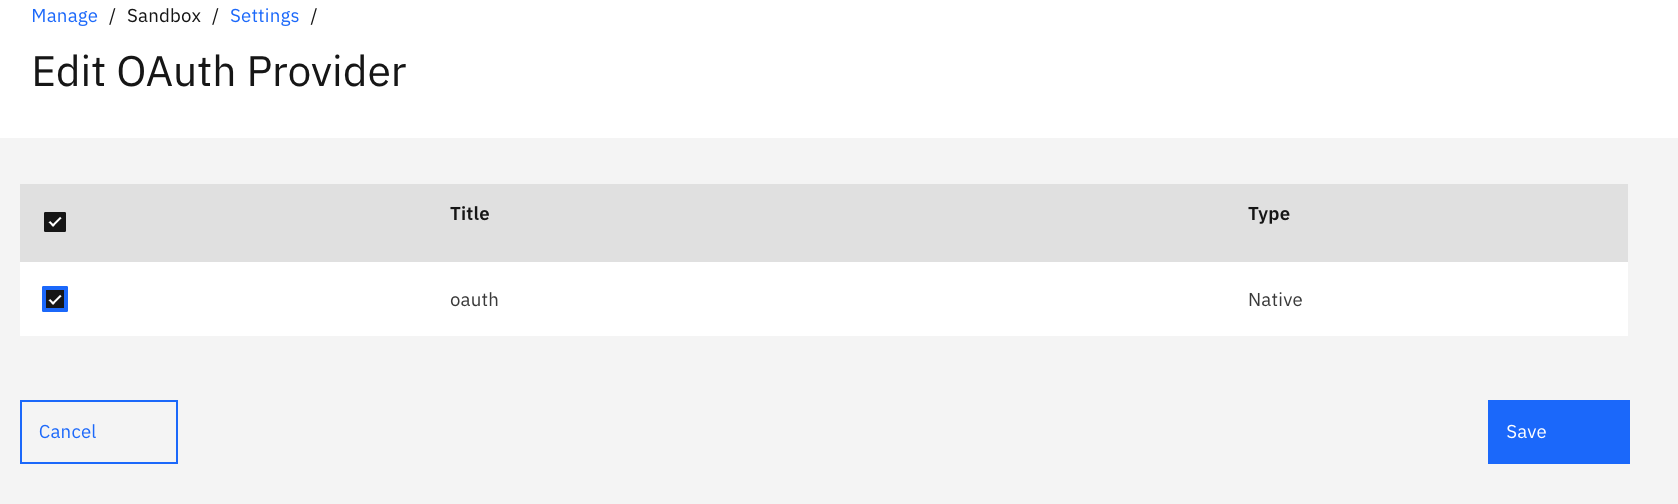
On the displayed menu, click [[OAuth Providers]].
-
Click [[Edit]].
-
Choose the OAuth service created above. Then click [[Save]]. Click on the back arrow to go back to Manage.
Create a New Version of the Inventory API
API Connect supports multiple versions of APIs. Create a new version of the inventory API before making any changes that would break functionality for existing consumers.
[Save as a New Version]
-
In the API Manager from the main menu on the left, click [[Develop]].
-
Click on the menu icon to the right of [[inventory 1.0.0]] API and select [[Save as a new version]].

-
Enter the new version number as [[2.0.0]] and click [[Submit]].
Add OAuth security to the Inventory API
Modify the security policy for your new API version to tell it to use your OAuth 2.0 provider.
-
From the Develop home page, click `Inventory 2.0.0`
-
Navigate to the [Security Definitions] section.
-
Click [[Add]].
-
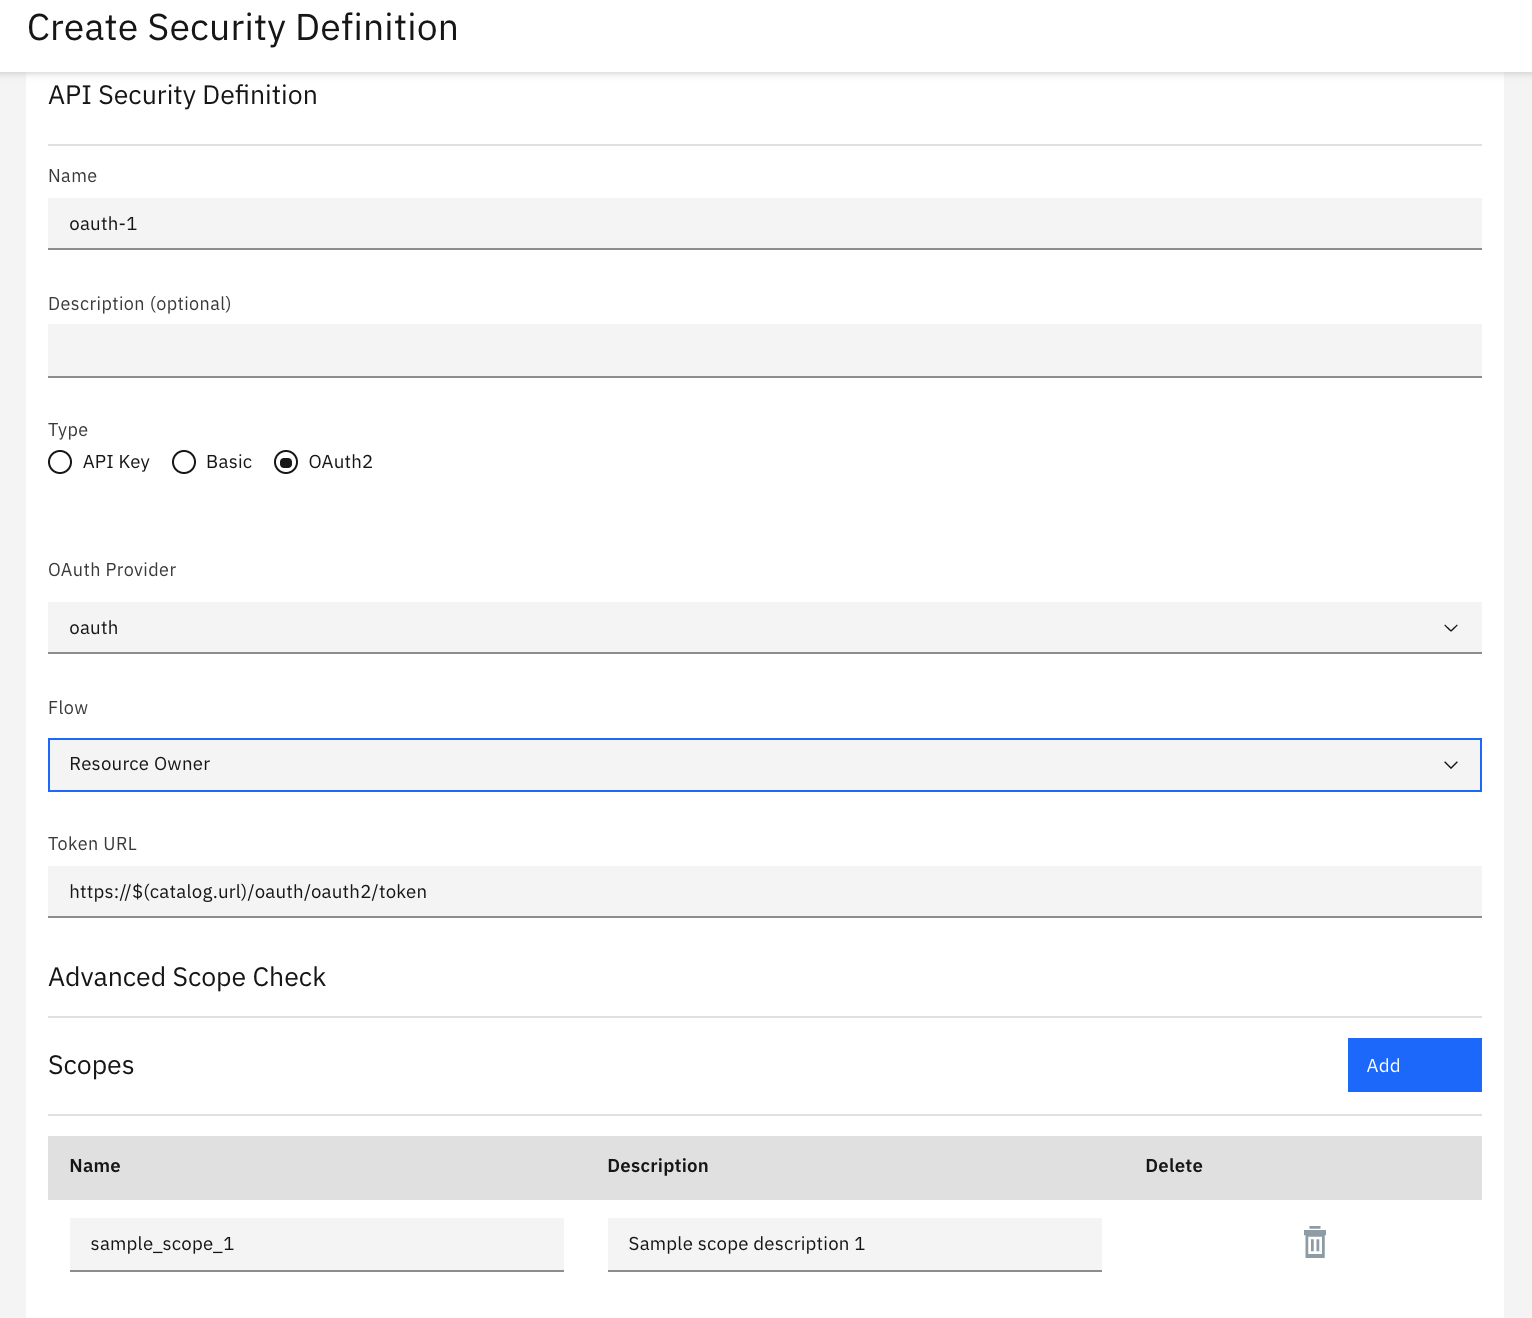
On the API Security Definition screen, enter the following:
-
Name: [oauth-1]
-
Description: [[API OAuth security definition]]
-
Type: [[OAuth2]]
-
Flow: [[Resource owner]]
-
Token URL: keep default [[https://$(catalog.url)/oauth/oauth2/token]]
-
Leave everything else to the default values and click Save.
-
-
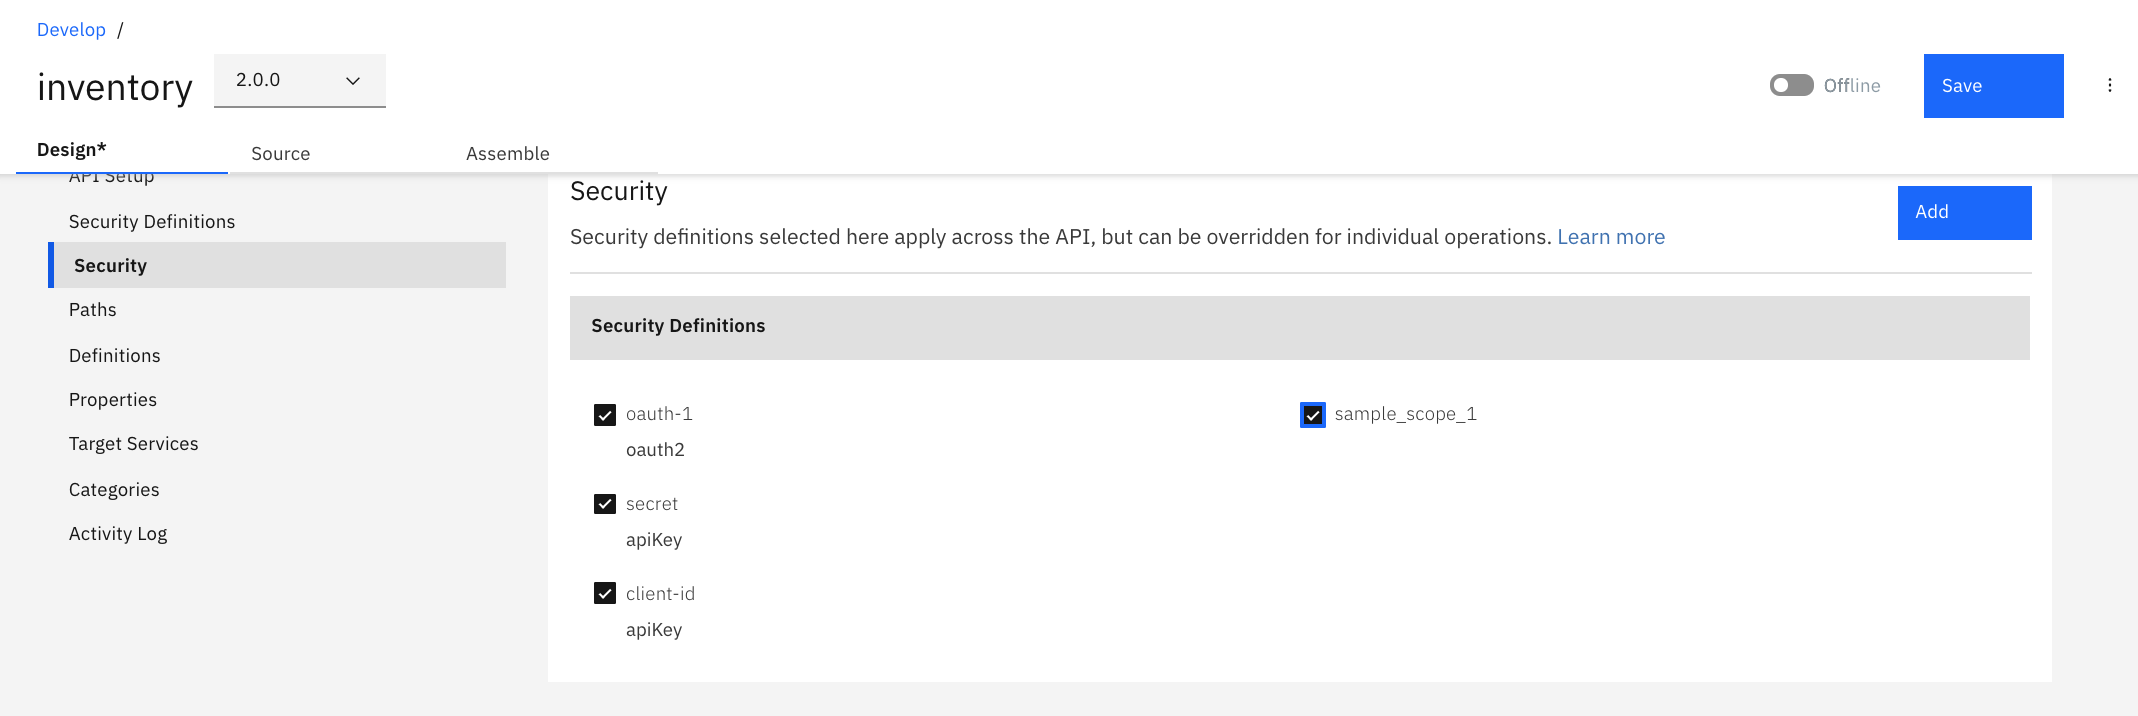
Navigate to the `Security` section and check the `oauth-1 (OAuth)` checkbox. Make sure `inventory` is also checked.
-
Save your changes.
Summary
You completed the APIC Dev Jam Lab 3 - Add OAuth Security to your API. Throughout the tutorial, you explored the key takeaways:
-
Configure an OAuth 2.0 service, the Resource Owner Password grant type.
-
Clone a new version of an API.
-
Secure the new version of your API.
Continue the APIC Dev Jam! Go To APIC (v10) Dev Jam Lab 4 - Use Lifecycle controls to version your API to manage the lifecycle of this API and test your new OAuth secured API.